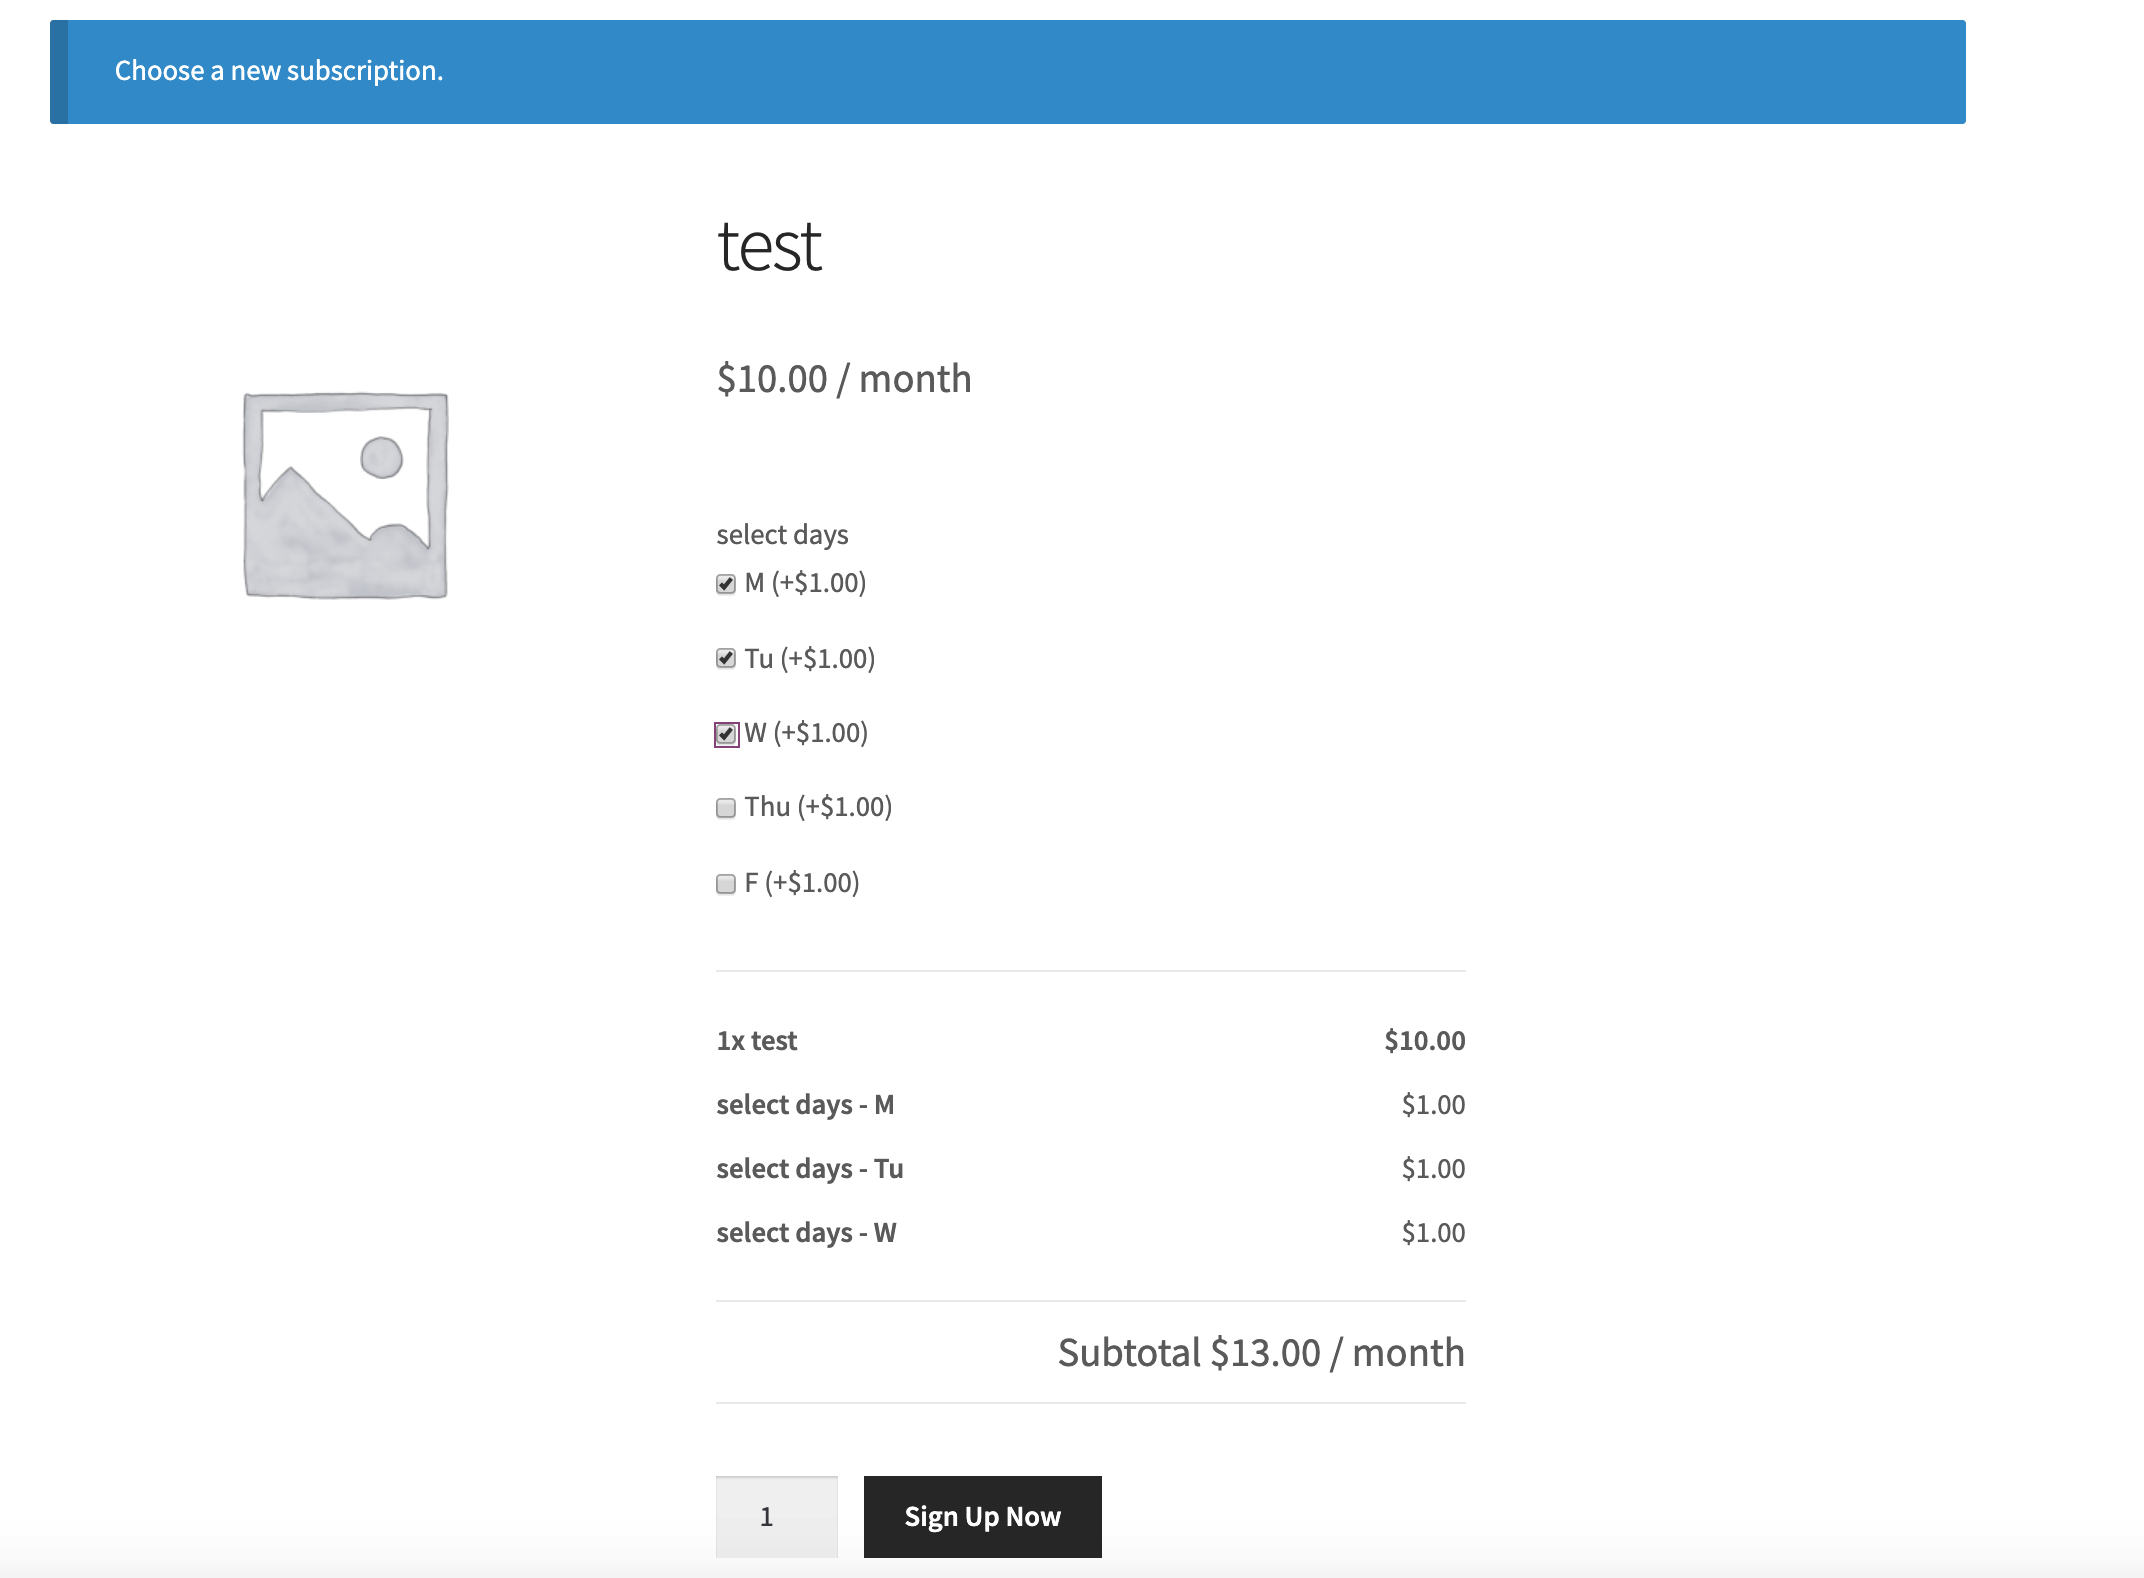
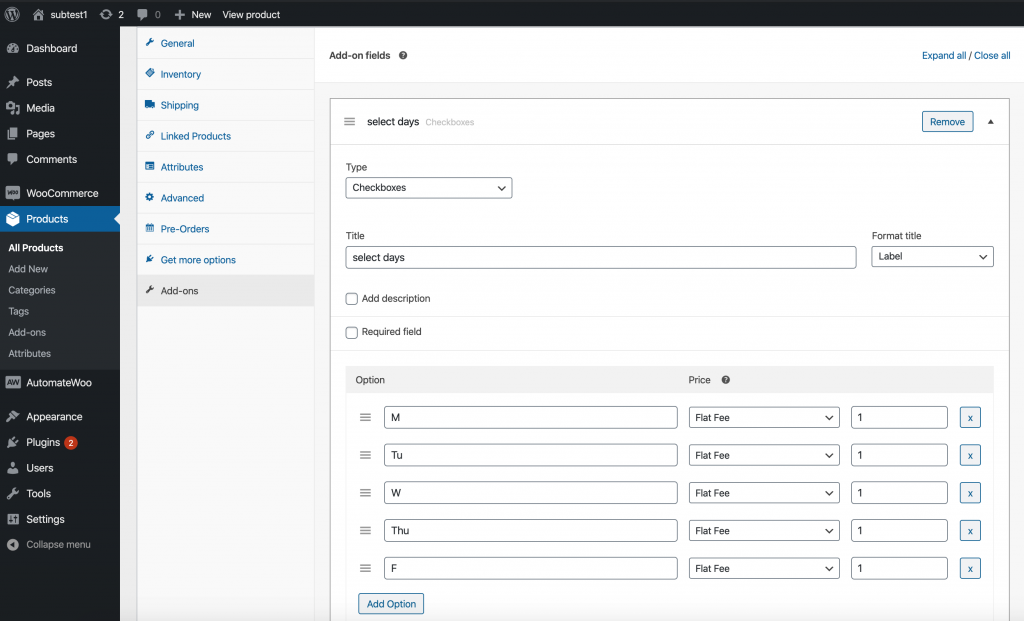
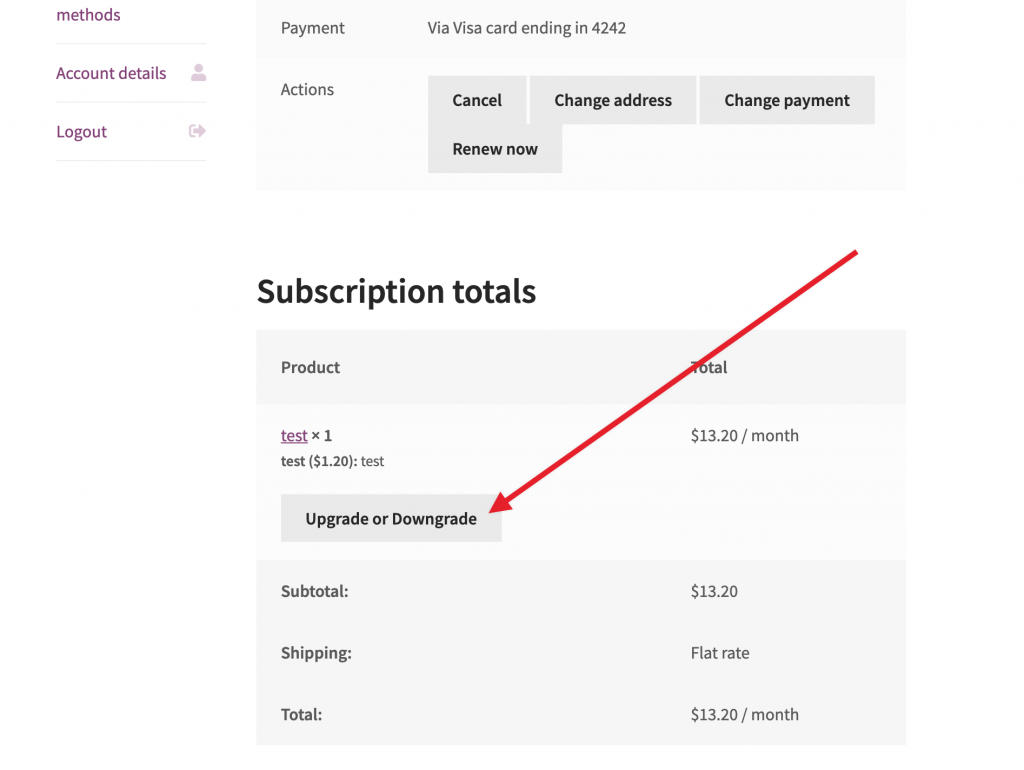
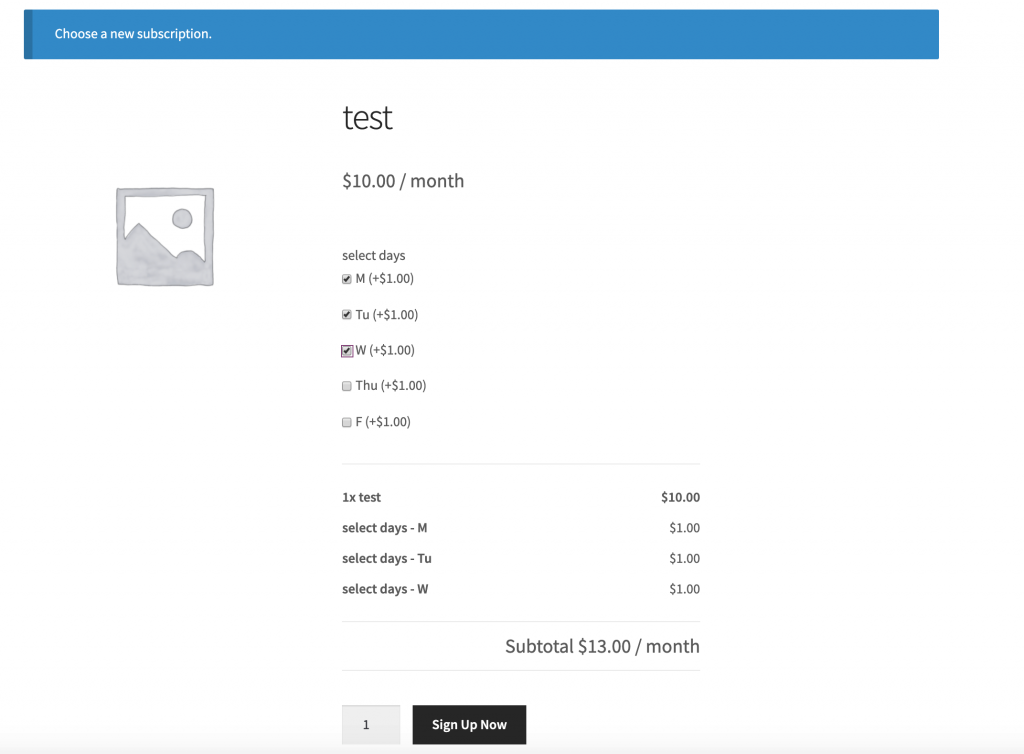
I have a client that is wanting to set up a subscription where the customer would select a product and it would allow them to select one or more weekdays. The cost of the subscription would be the total of the weekdays selected, and it would be a weekly-recurring order. What I’m wondering is if the Product Addons plugin would work with the Subscriptions plugin and allow the customer to go in and update their subscription to change the weekdays? So, they originally select Mon/Wed/Fri and then later on, if they wanted to could change that to Mon/Tue/Wed/Thu/Fri and have the subscription be updated, rather than cancelling and starting a new subscription.
This month, I was lucky enough to spend a week in Charlotte taking the 3-day intensive leadership training course that was lead by Reboot. I’m sure there are many recaps and reviews that try to take 3 days worth of jam-packed content and try to distill it into a single post. Instead, I will drop in some takeaways and bite-sized quotes that will give you a flavor of what it was like from my perspective.
TL;DR Reboot was valuable. Here are some tidbits and thoughts of my own.
Share what you’re aware of, and ask about what you’re unaware of.
We take actions based on beliefs.
To generate action, first generate belief in the motivation behind that action.
Don’t disguise advocacy in the form of a question.
Stress can result in leaders treating people like problems.
When someone brings something to you, don’t assume that it’s a problem that you need to take action with. If you’re tempted to take action or offer a solution, ask first if that’s what they need.
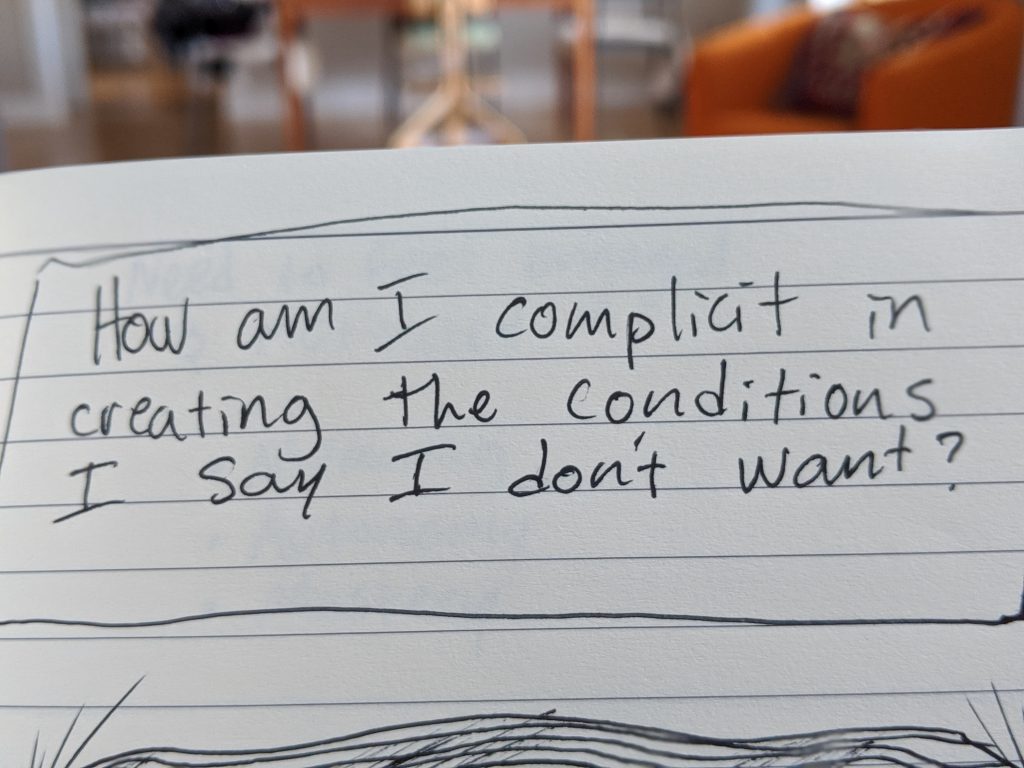
How am I complicit in creating the conditions I say I don’t want?
The number one indicator of a high performing team is psychological safety.
This has been obvious to see with the Prospress acquisition. Our team went from being in a safe space and clear sense of belonging to a period of lack of clarity around where we belong. Ideally, we are and can continue to work our way back to belonging, and by extension, being a high performing team.
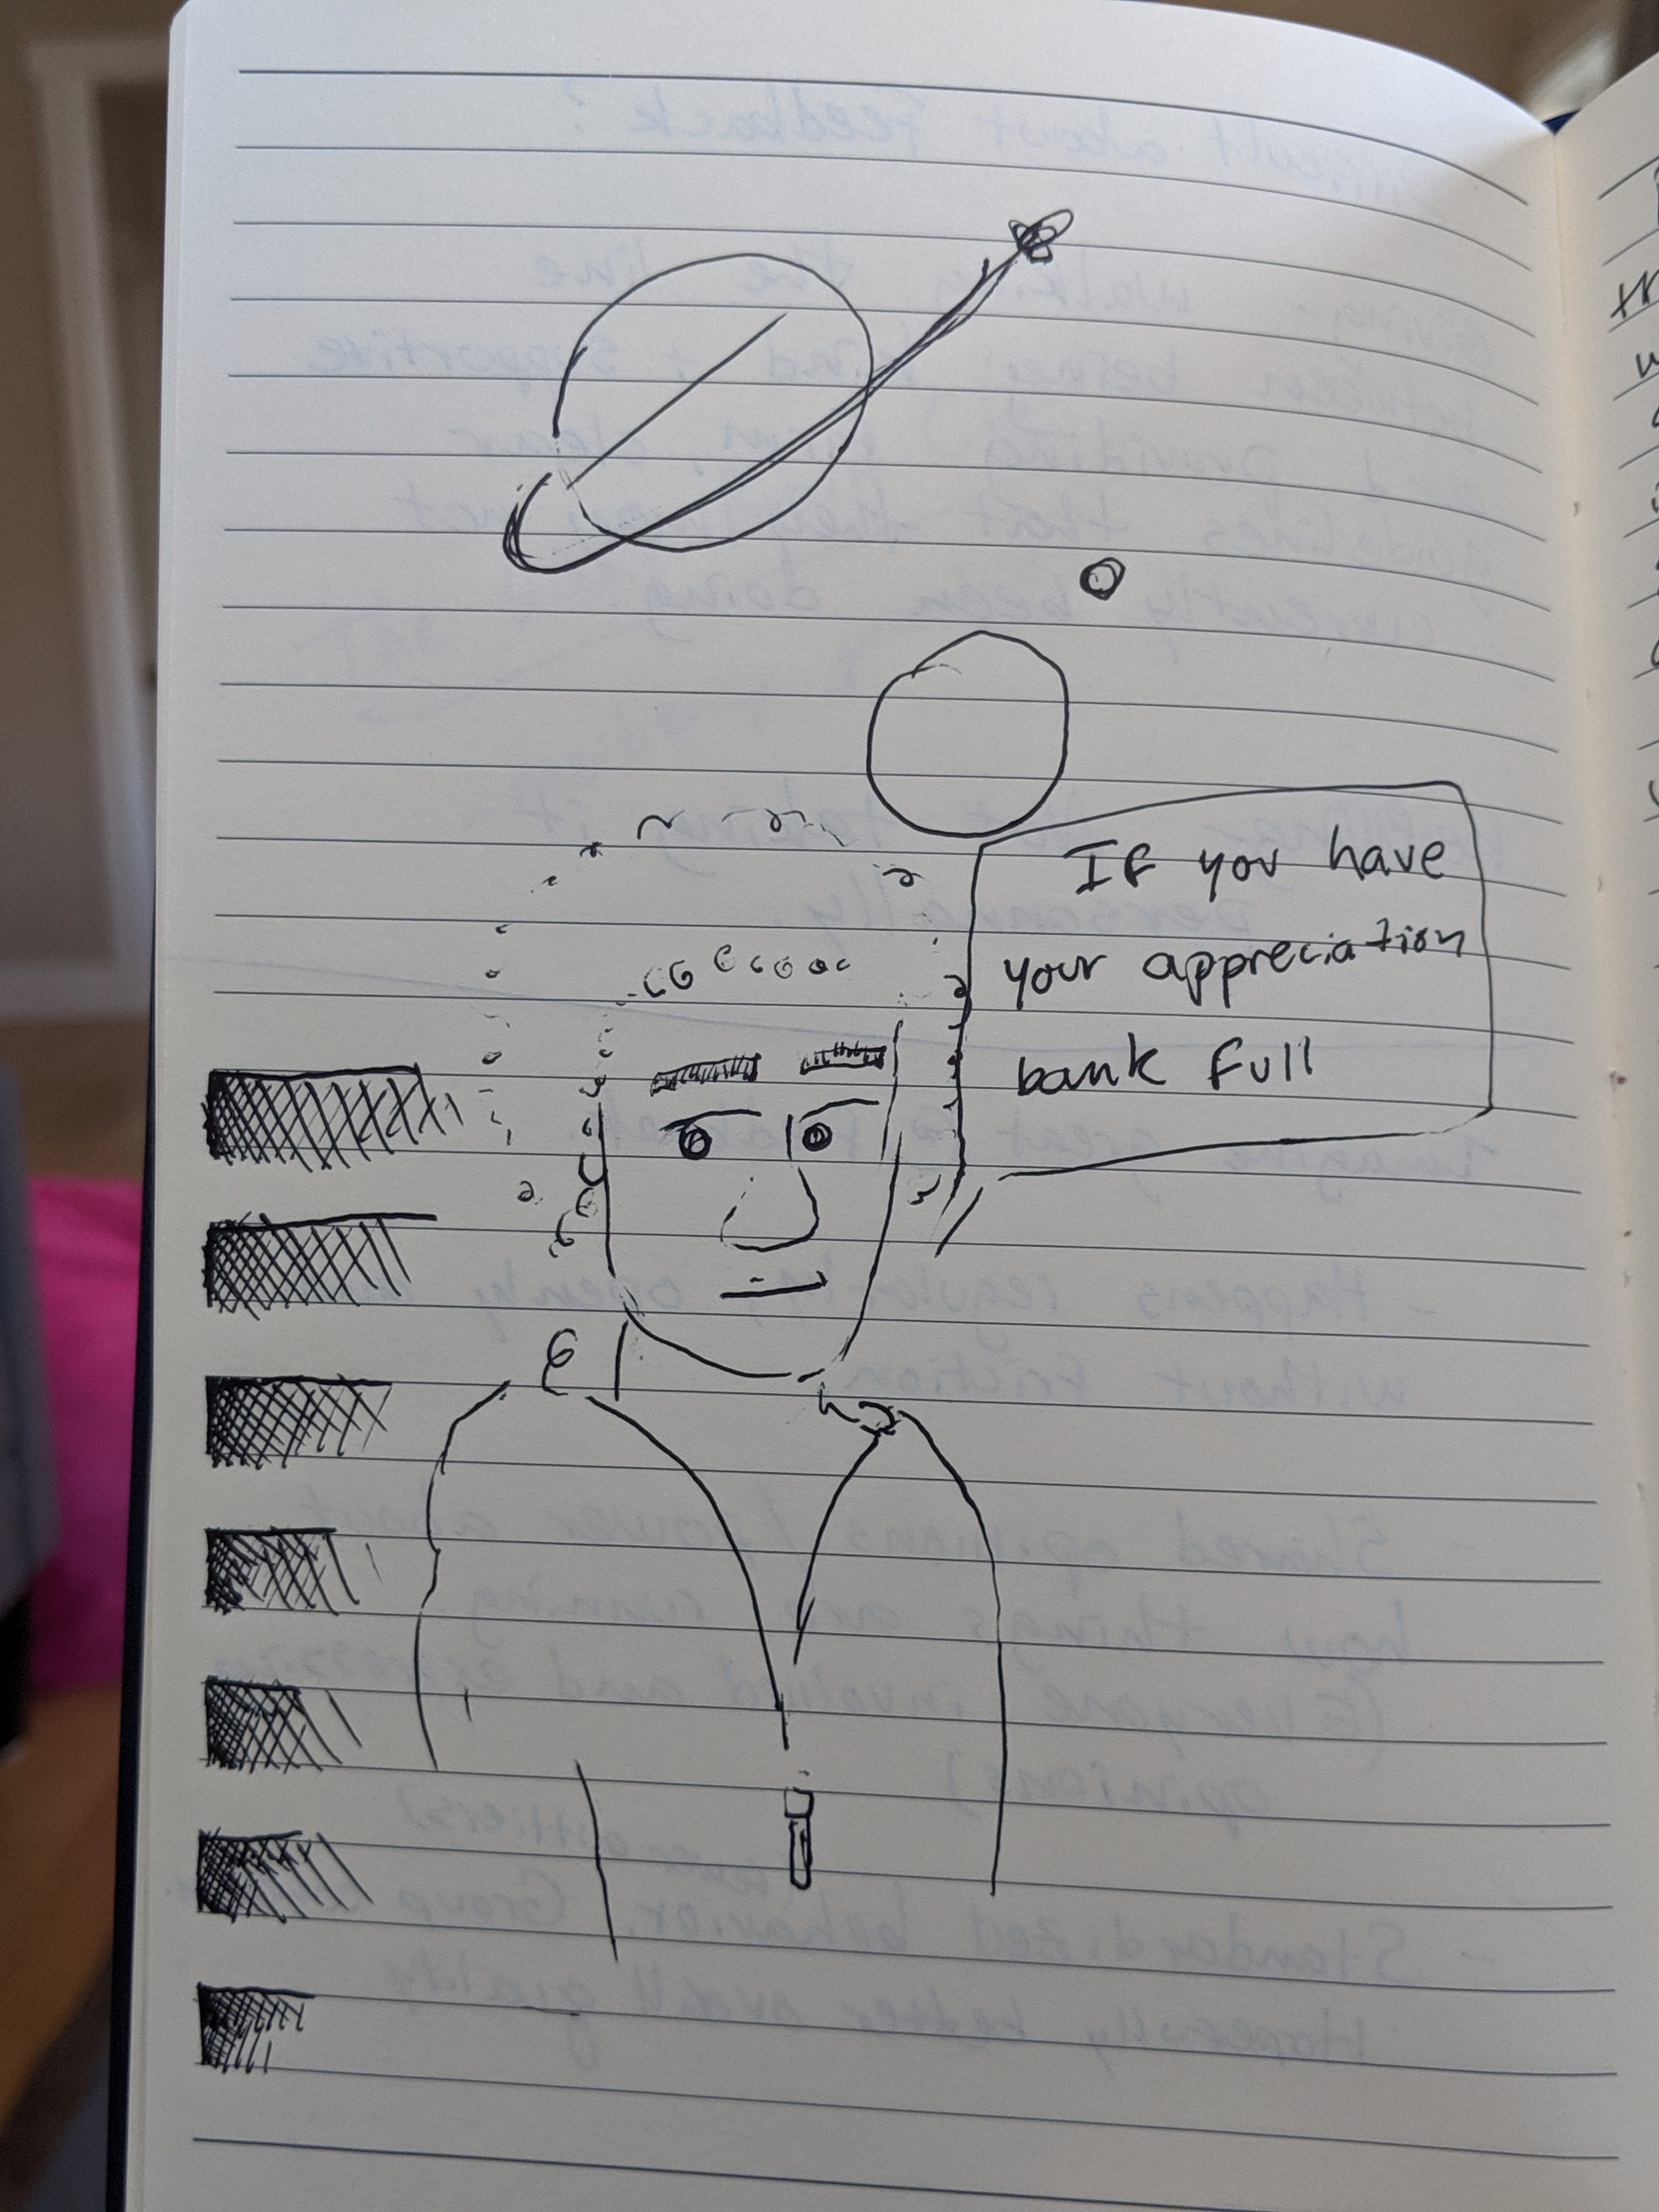
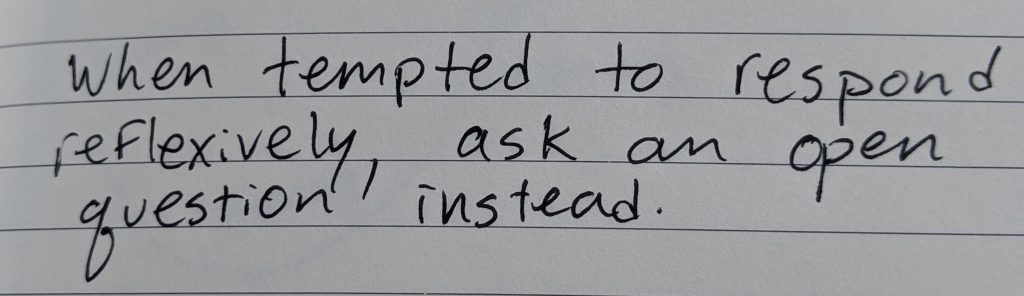
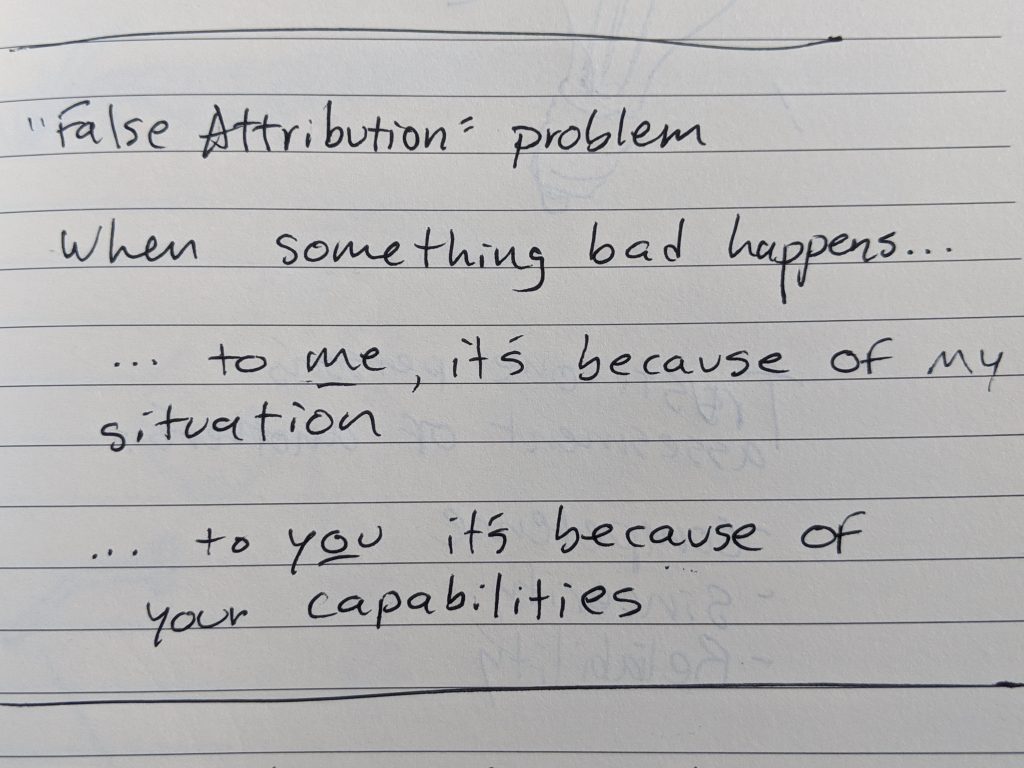
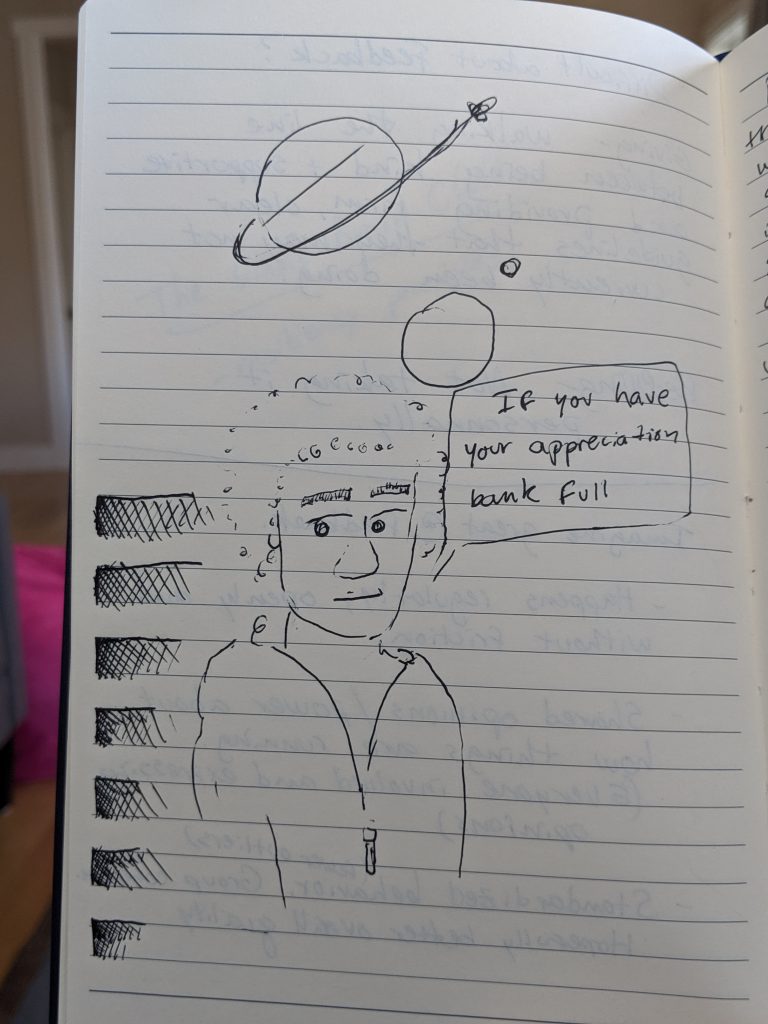
When tempted to respond reflexively, ask an open question instead.The False Attribution problem is a mental model when people think that when something bad happens to me, it’s because of my situation, but when it happens to you, it’s because of your capabilites.It’s easier to receive feedback if you have your appreciation bank full.
Asking good questions is the most underused leadership skill.
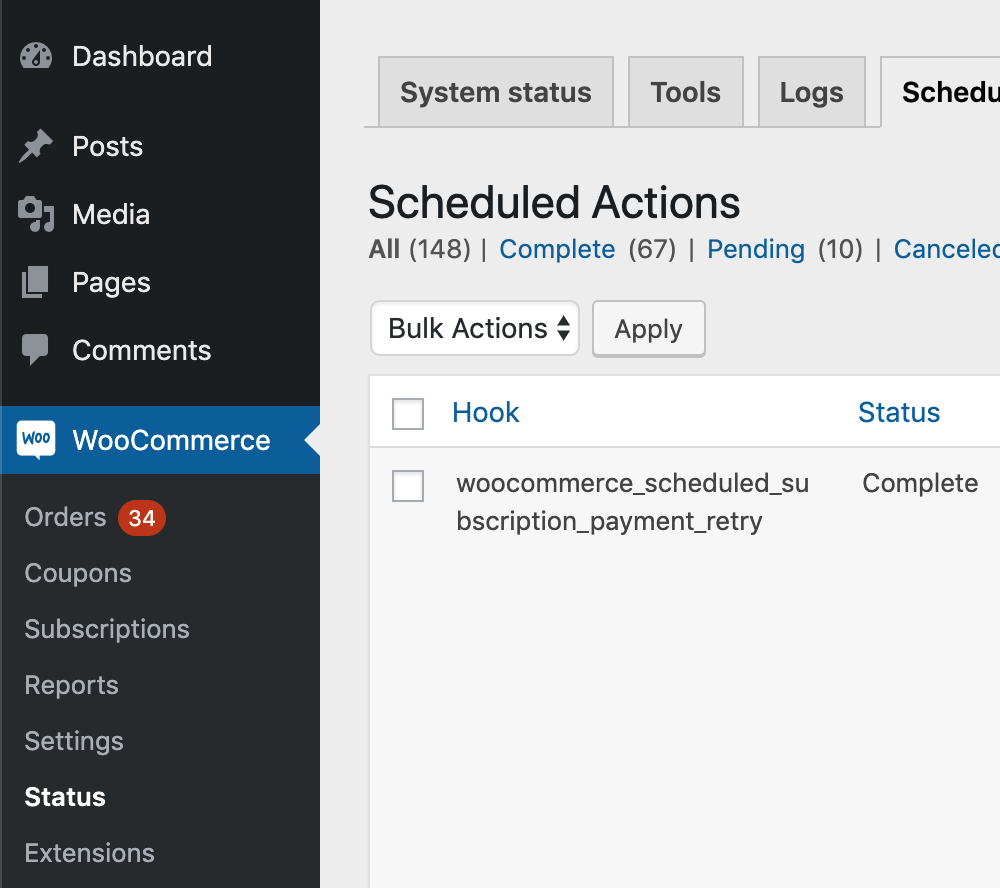
This will change the scheduled action retention period to 14 days (instead of the default 30 days). After your completed actions get down to a reasonable number, you can then remove that filter.
You could also shorten it to one day, wait a day, then remove it.
Clear out pending actions safely
Speed Up Processing
The best approach is to just speed up the processing of actions so that the queue completes.
There are a few approaches for this, from simplest to hardest:
update WordPress, WooCommerce & Subscriptions. Specifically, if Subscriptions 3.0+, WooCommerce 4.0+, and WordPress 5.1+ are running, processing speeds should be much higher than with prior versions. If you aren’t already running those or another plugin that includes Action Scheduler 3.0+, the first step is to update to one of those. If you’re not sure, you can also load Action Scheduler 3.0+ as a standalone plugin: https://github.com/woocommerce/action-scheduler/releases
if the above doesn’t work, because it’s not processing actions fast enough, then it may be necessary to setup WP CLI runners. Two helpful guides on that:
This plugin will still work, but upgrading to AS 3.0+ will give all of the same benefits with the new async queue runner.
Clear out pending actions dangerously (you know what you’re doing)
NOTE: The queries below should be used at your own risk, on a staging site, etc.
Delete Data
If it’s not possible to speed up processing enough to clear the pending actions, then it may be necessary to clear the queue by deleting pending scheduled webhook actions.
This is only safe when you know the pending webhook actions aren’t necessary. For example, reporting plugins like Metorik use Webhooks as a backup data sync method, so they canbe safely synced. Some services will require these webhooks, in which case, it’s not safe to simply delete them.
To delete the actions:
deleting logs and metadata for those scheduled webhook actions
deleting all scheduled webhook actions
The queries to do this:
1. Delete logs for scheduled webhook actions
DELETE lg FROM wp_actionscheduler_logs lg LEFT JOIN wp_actionscheduler_actions aa ON aa.action_id = lg.action_id WHERE aa.status LIKE 'pending' AND aa.hook LIKE 'woocommerce_deliver_webhook_async'
2. Delete trashed scheduled webhook actions
DELETE FROM 'wp_actionscheduler_actions'
WHERE status = 'pending'
AND hook = 'woocommerce_deliver_webhook_async'
Other Helpful Queries
Query to find actions processed in a 1-hour window (update dates to suit):
SELECT hook, COUNT(*) FROM wp_actionscheduler_actions WHERE status = 'complete' AND last_attempt_gmt > '2020-05-08 06:30:00' AND last_attempt_gmt < '2020-05-08 07:30:01' GROUP BY hook
Query to find pending actions in the past:
SELECT hook, COUNT(*) FROM wp_actionscheduler_actions WHERE status = 'pending' AND last_attempt_gmt < '2019-02-08 00:00:00' GROUP BY hook
Customer wanted to offer free shipping on any orders of at least $25. Additionally, they wanted any subscription renewals to charge shipping normally – the free shipping should only apply to the initial order.
To solve this, I’ve suggested using a free shipping coupon, which is applied automatically to the cart if it’s $25 or more. The end result is:
Free shipping on initial cart (if it is at least $25)
Normal shipping charged on any subscription renewals for subscription products purchased.
Step 1 – Create Free Shipping Coupon
Go to WooCommerce > Coupons > “Add coupon”
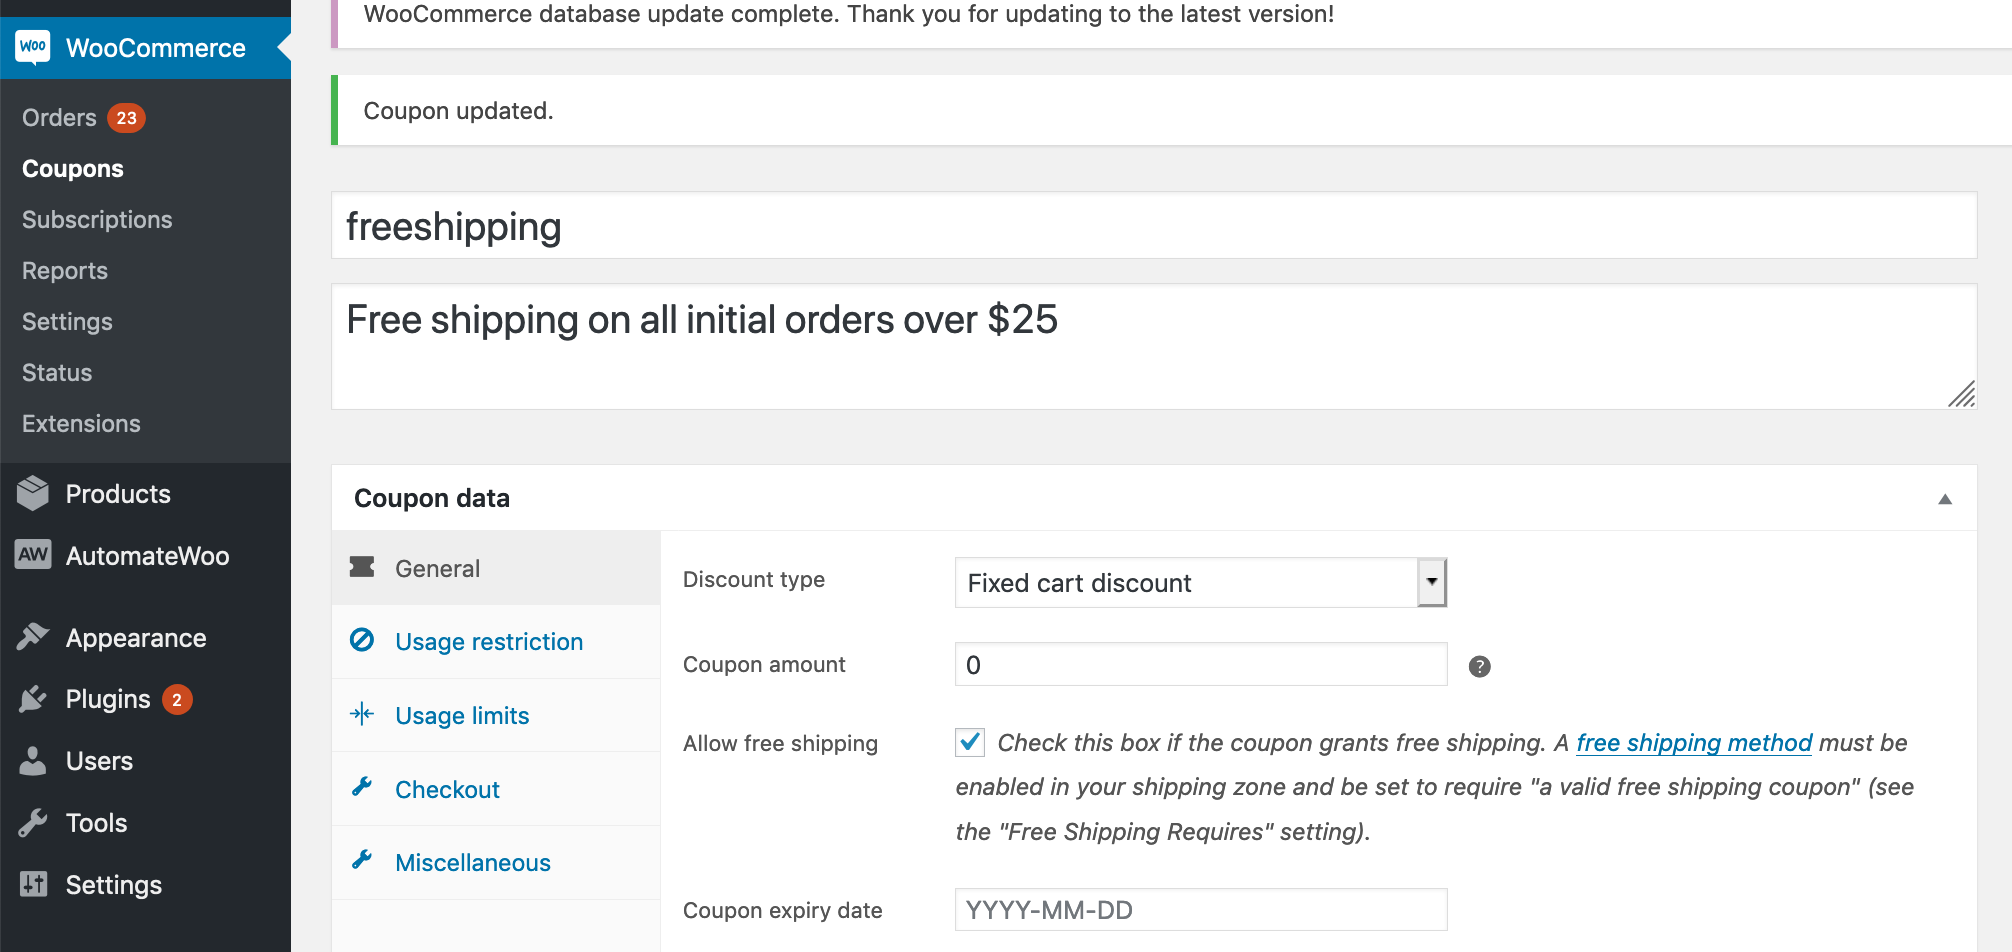
Create a fixed cart discount named “freeshipping”
Set it to a $0 discount, and click “grants free shipping”
Optionally limit coupon to a $25 minimum
Create a freeshipping coupon
NOTE: For free shipping coupons to work, you have to have a free shipping option set in your shipping settings. Be sure to select “Free shipping requires a valid coupon” for this shipping option.
Step 2: Auto-apply coupon
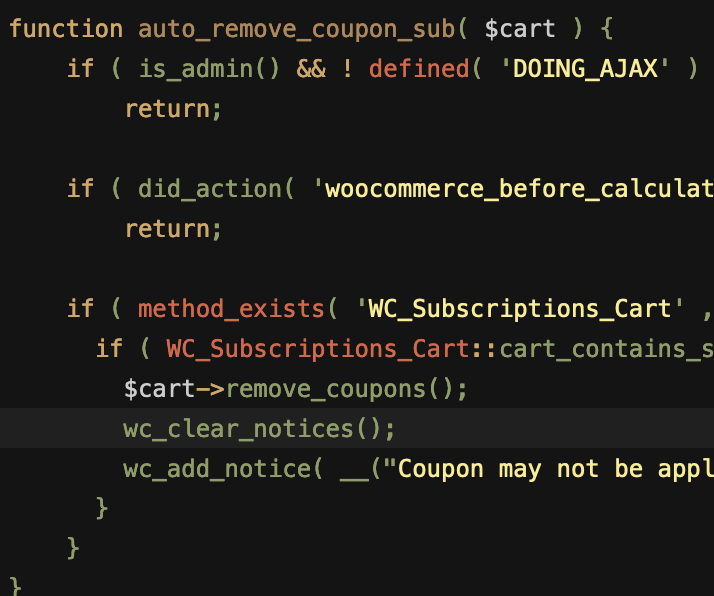
To auto-apply a coupon to the cart without using a 3rd-party plugin, you can add this snippet to your theme’s functions.php file. This particular snippet is set up to auto-apply on all initial orders of at least $25, but it can be edited as needed to conditionally check for quantities, products, etc.
The end result is a free shipping coupon that is automatically applied to the initial order, but not applied to the recurring cart.
Here’s a mini-plugin I wrote which extends the functionality of WooCommerce Subscriptions. It restricts subscription products to a certain number of total active (unended) subscriptions on a site.
Use case: store owner wants products and subscriptions to have a one-to-one relationship, i.e. each product should only be subscribed to once. For example, subscription product is a child to be sponsored, and only one subscriber should be sponsoring that child at a time.
This plugin creates and maintains a list of products that have unended subscriptions associated with them, then makes these products unpurchasable from front end to make sure that the subscription product can only be subscribed to a certain number of times. It doesn’t change ability to check out with product, so that customer can pay for failed order through cart, and manual renewals are unaffected.
Note: This plugin is designed to work independently of the
WooCommerce inventory system, and so inventory should be disabled for
all subscription products, or you may have problems with customers not
being able to pay for failed renewal orders manually.
Go to Plugins > Add New > Upload administration screen on your WordPress site
Select the ZIP file you just downloaded
Click Install Now
Click Activate
How-to
Set Product Restriction
There are two ways to set a product restriction, either storewide or on a product level. Setting a product level restriction is more specific and will override the storewide default. If you set either to ‘0’ or leave them empty, they are considered not set.
Storewide Restriction
You can set a default storewide restriction which will apply to all subscription products by going to WooCommerce -> settings -> Subscriptions (tab) -> Product Restriction
Product-level Restriction
You can also set a product restriction for a specific product by
editing the product, and clicking on the ‘Advanced Options’ tab in the
Product Data metabox. This will set the product restriction on a product
level for simple and variable subscription products. That means that
the restriction applies no matter which variation of a variable product
is subscribed to.
To activate the product-level restriction, you must click the “Activate product-level restriction” checkbox.
If “Activate product-level restriction” checkbox is checked, but the
restriction quantity is blank, then no restriction will be applied to
this product, even if there is a systemwide default set elsewhere.
Renewals and Switching
Renewals and Switches are taken into account when checking if a purchase should be restricted.
Renewals
Automatic renewals are not restricted at all, and should process normally. Similarly, manual renewals will still allow the product to be purchased/renewed through the cart.
Subscription Switching
Switching is accounted for when checking restrictions. When switching
between simple subscription products, the checks still occur as normal.
When switching between variations of the same product, the restrictions
are ignored, allowing the switch to occur.
Visibility
When displaying a product in the catalog or archive pages, this plugin will hide the product if it is restricted, and if the ‘Out of stock visibility’ option is checked in WooCommerce settings -> products -> inventory tab.
Warning Messages
There is currently no way to customize the warning message presented
when a restriction is encountered. Additionally, when product variations
are deemed not purchasable, the default WooCommerce alert box is
triggered, which is not descriptive of why.
For this reason, we recommend you add in some descriptive text to
your product description indicating that it is restricted, and why.
Additional Notes
Restrictions don’t apply retroactively, only to future purchases. In
other words, any given purchase is checked against the current
restriction and current number of active site-wide subscriptions. No
already-existing subscriptions will be cancelled or suspended if you
change the restriction number. Future purchases will be checked against subscriptions that existed before the plugin was activated, however.
Deactivating the plugin will stop the restriction checks, and will
delete the cache. However, the restriction option values (set in the
WooCommerce settings tab or product options) will stay in place in case
you choose to reactivate the plugin in the future.
Troubleshooting
To view the current cache for troubleshooting purposes, navigate to the ‘plugins’ page and click the ‘view cache’ option.
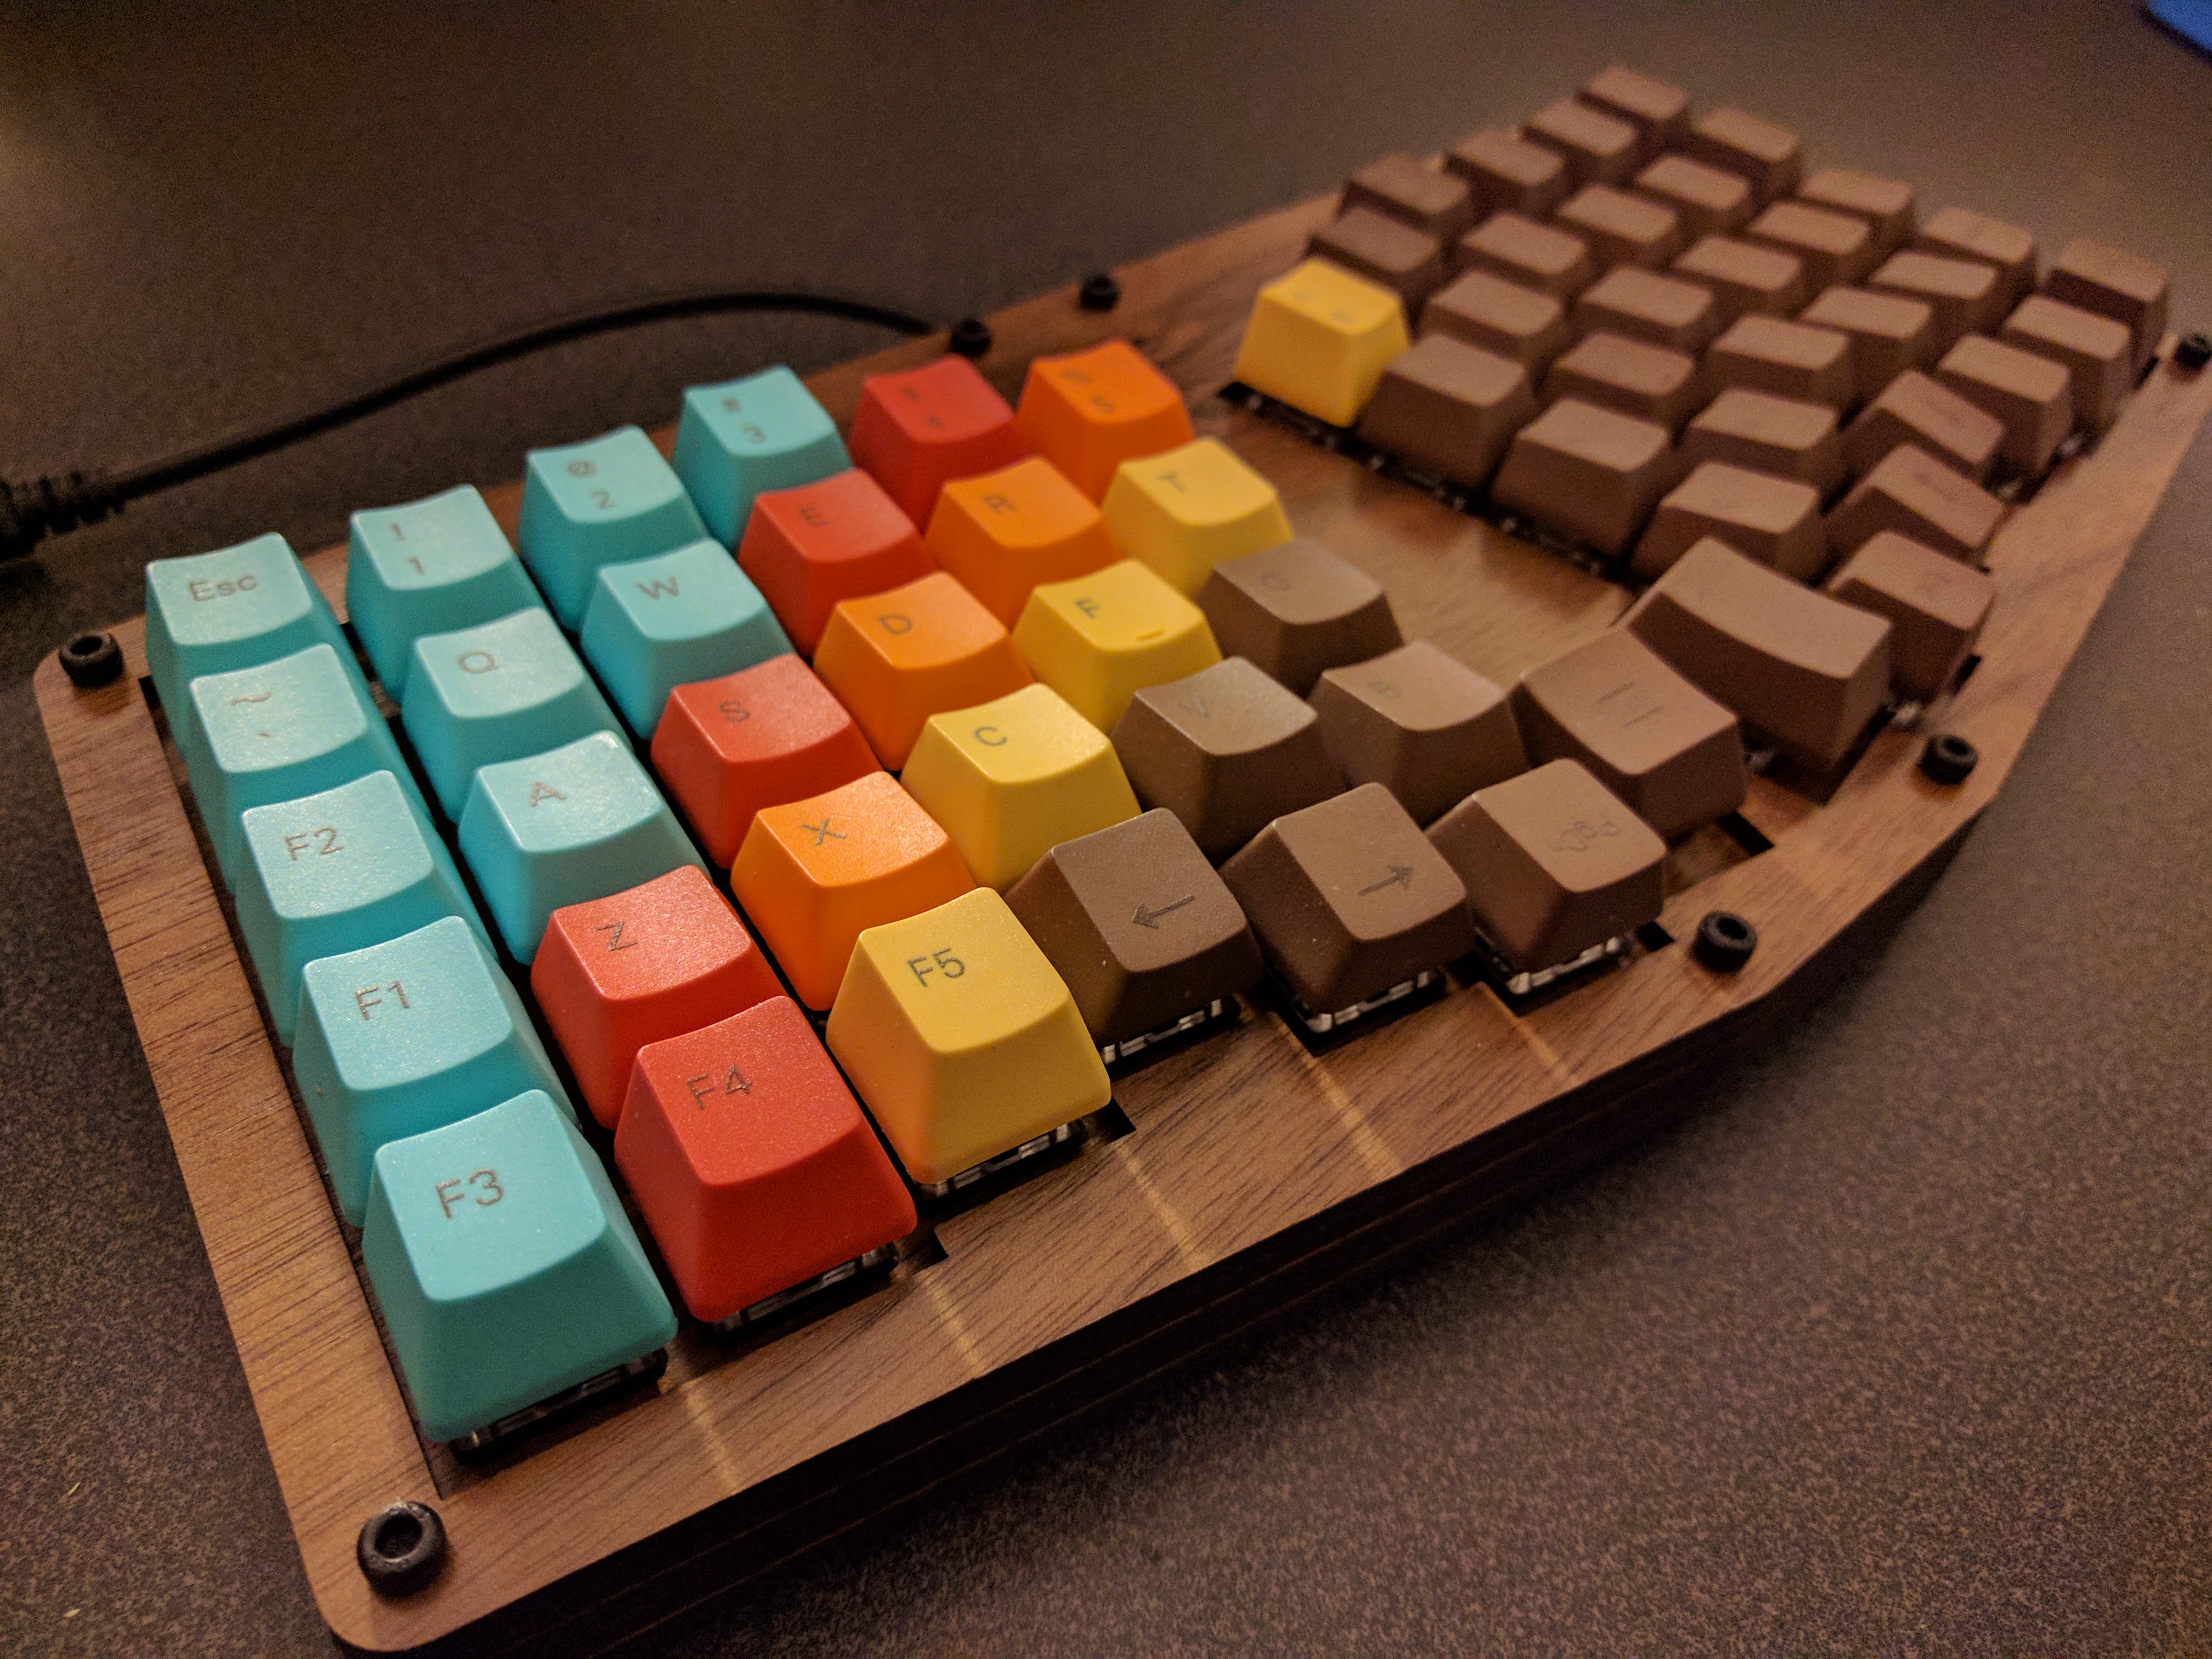
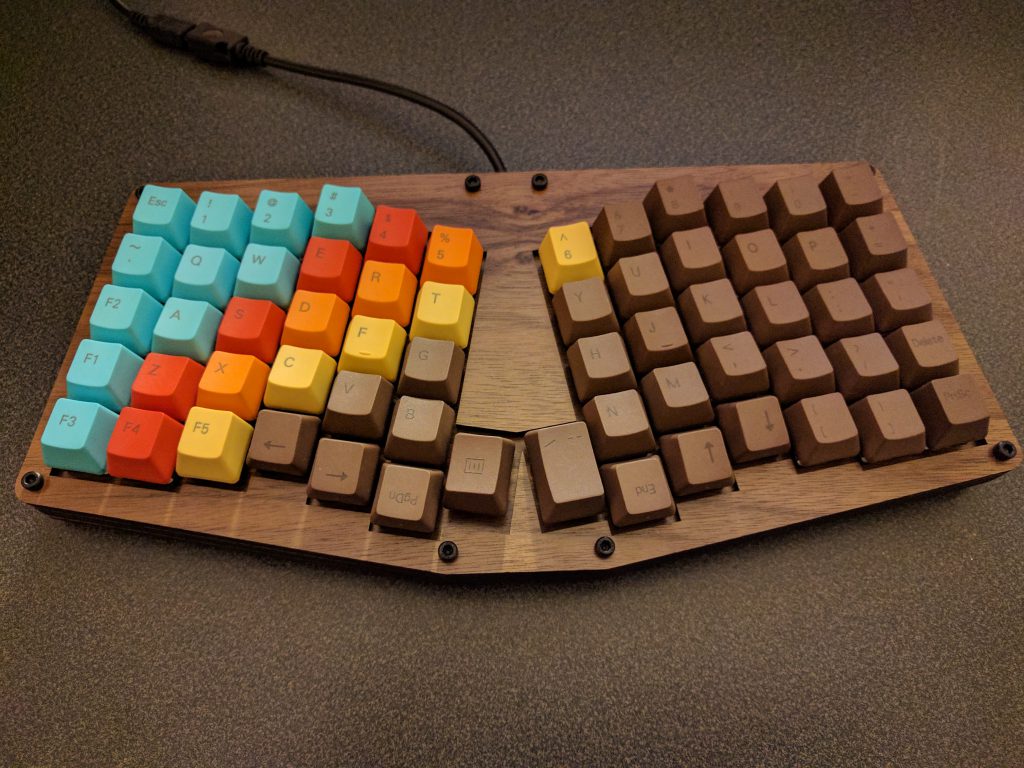
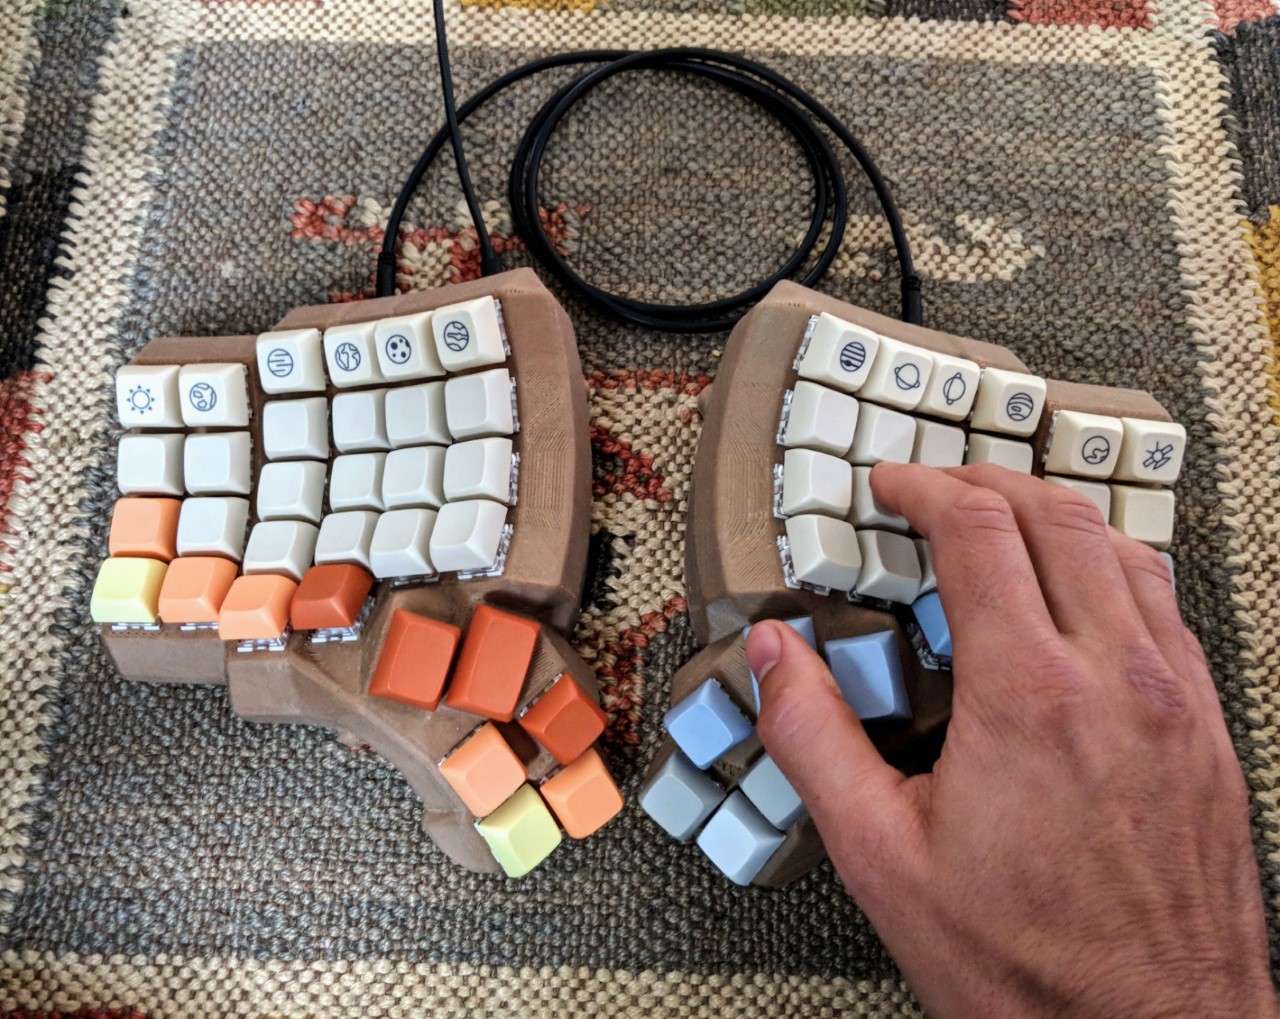
Case 3d printed custom by u/crystalhand using 30% wood filament. Based on these files, edited for BOX switches and TRRS connectors, as well as placing the pro micro holders in slightly different location.
2 Pro Micros
2 RJ9/TRRS connectors
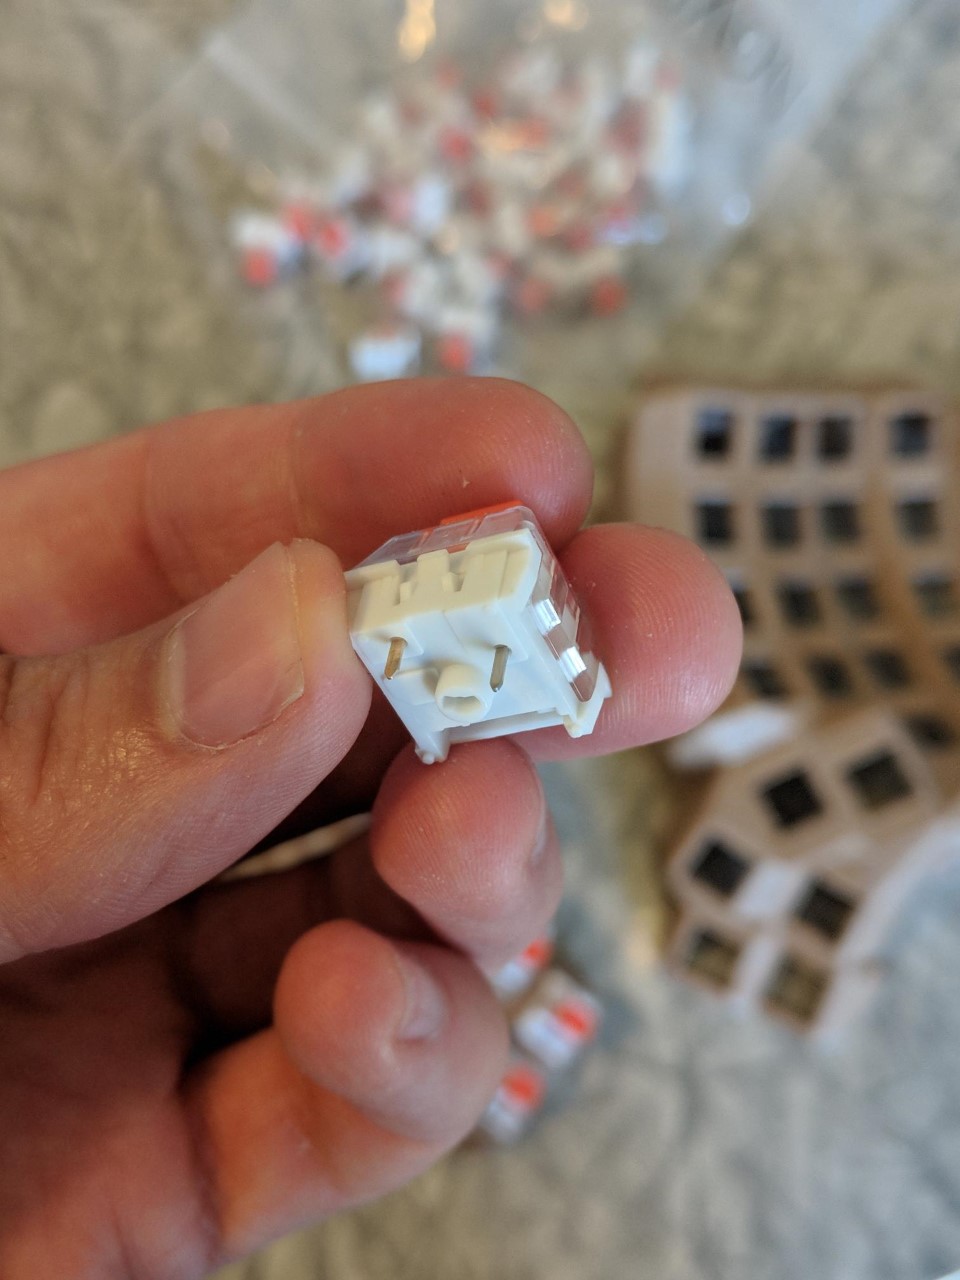
76 BOX Burnt Orange switches
76 Diodes
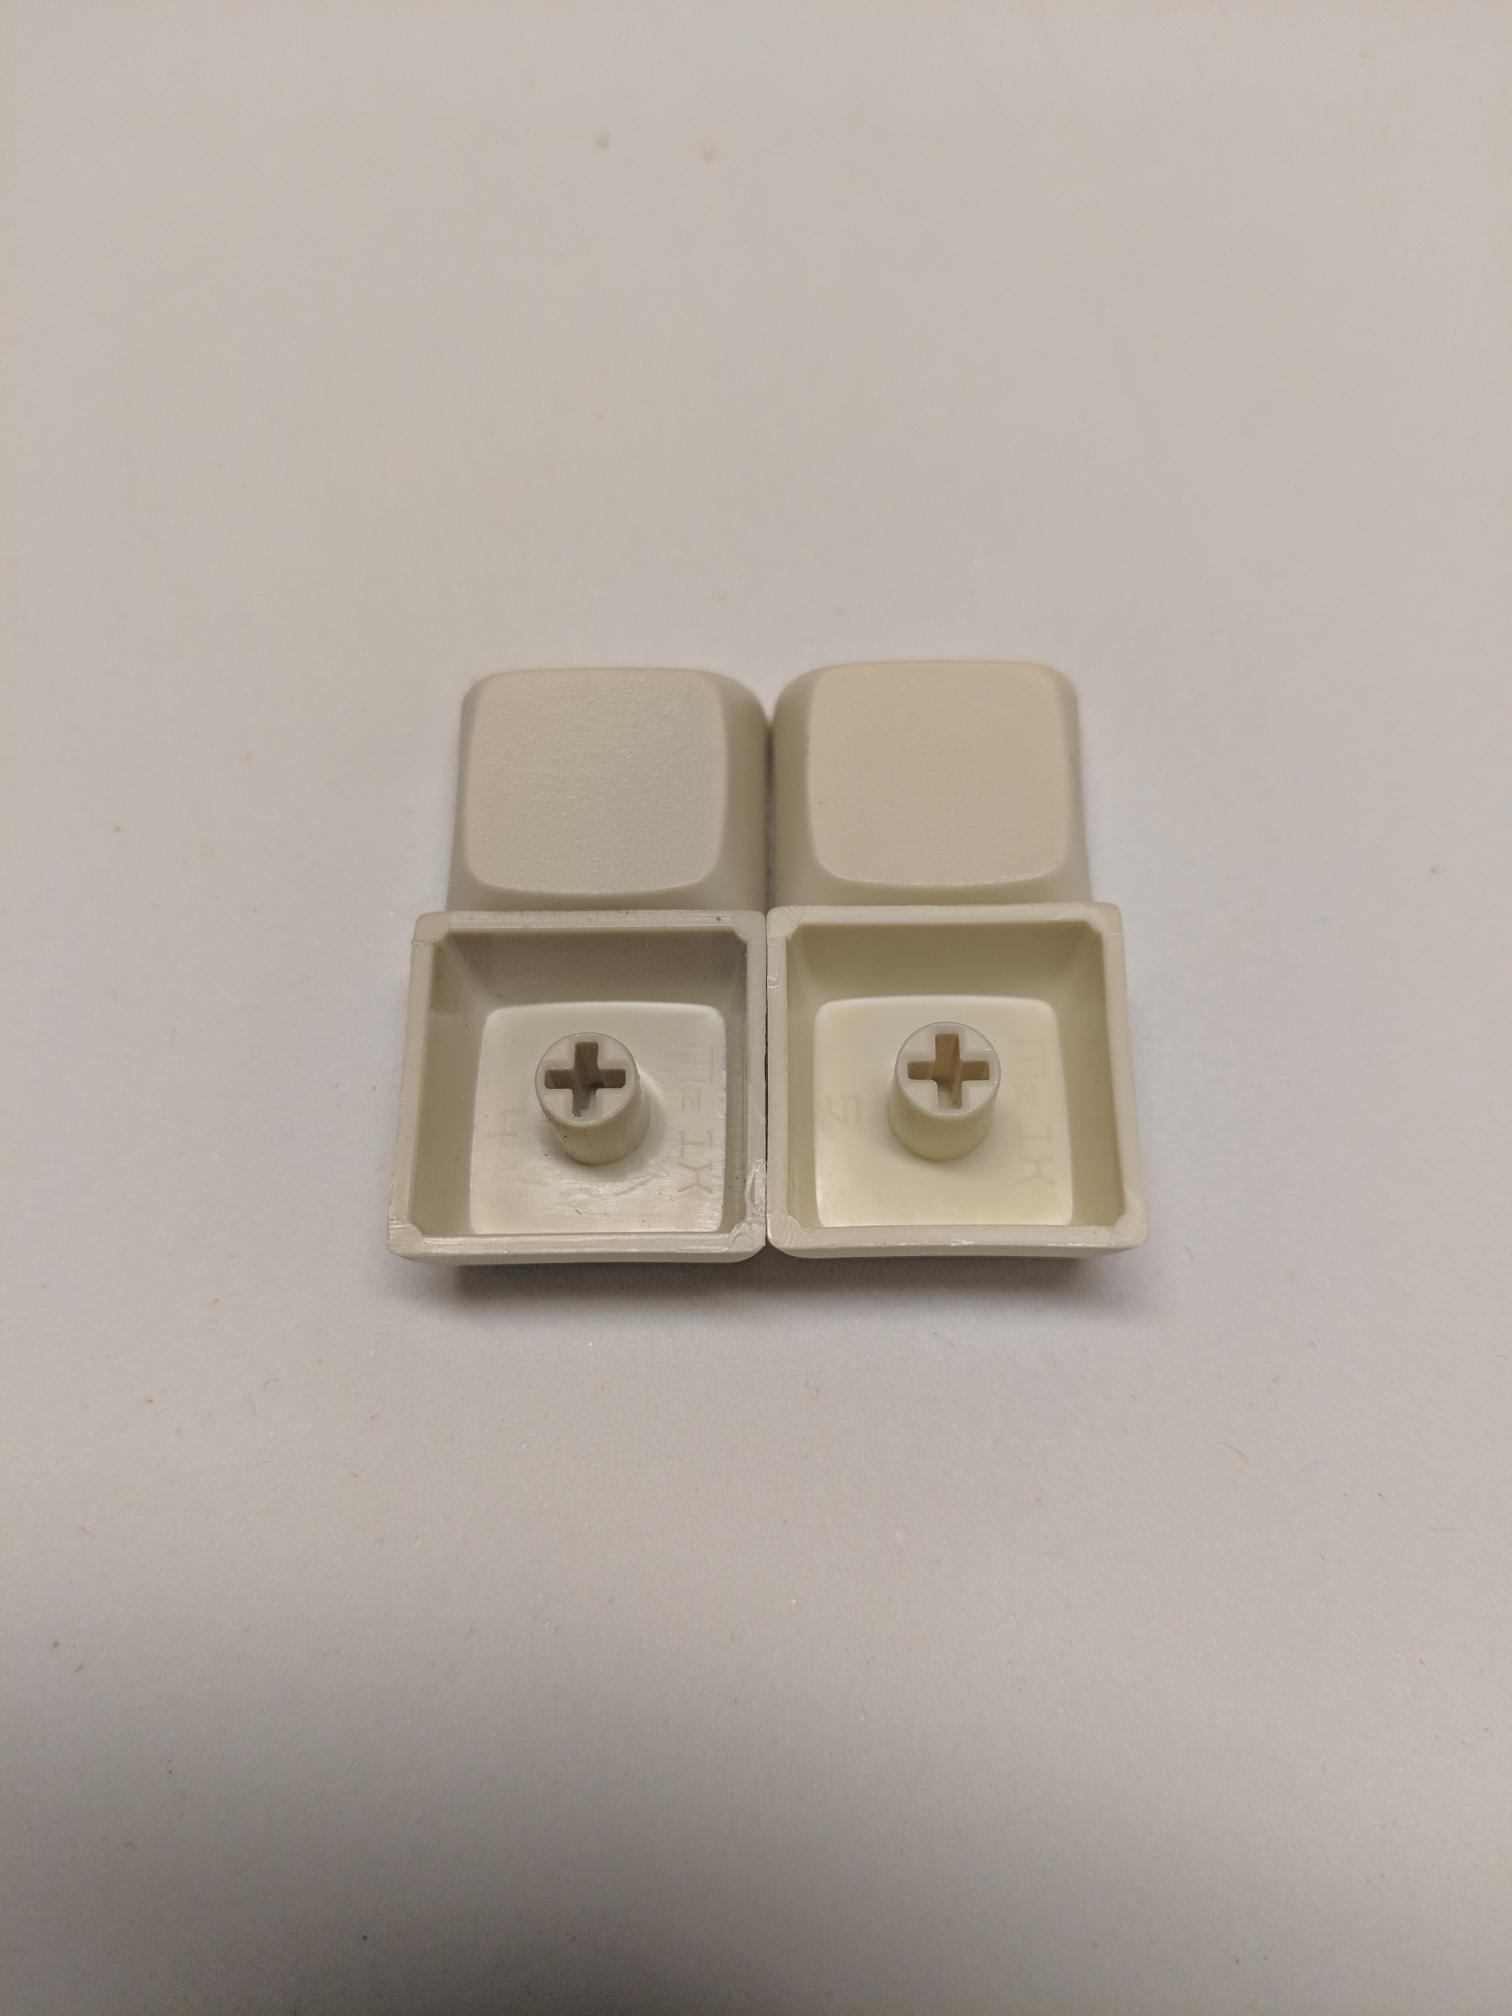
XDA Keycaps. Mostly from here.
Took a few hours of sanding after this pic. I decided I liked the unstained, unpainted look. It’s homemade, and I want it to look that way.
Making sure the keycaps I sourced from a couple of different places were close enough in color. Name brand vs. chinese aliexpress generics. Good enough for me!
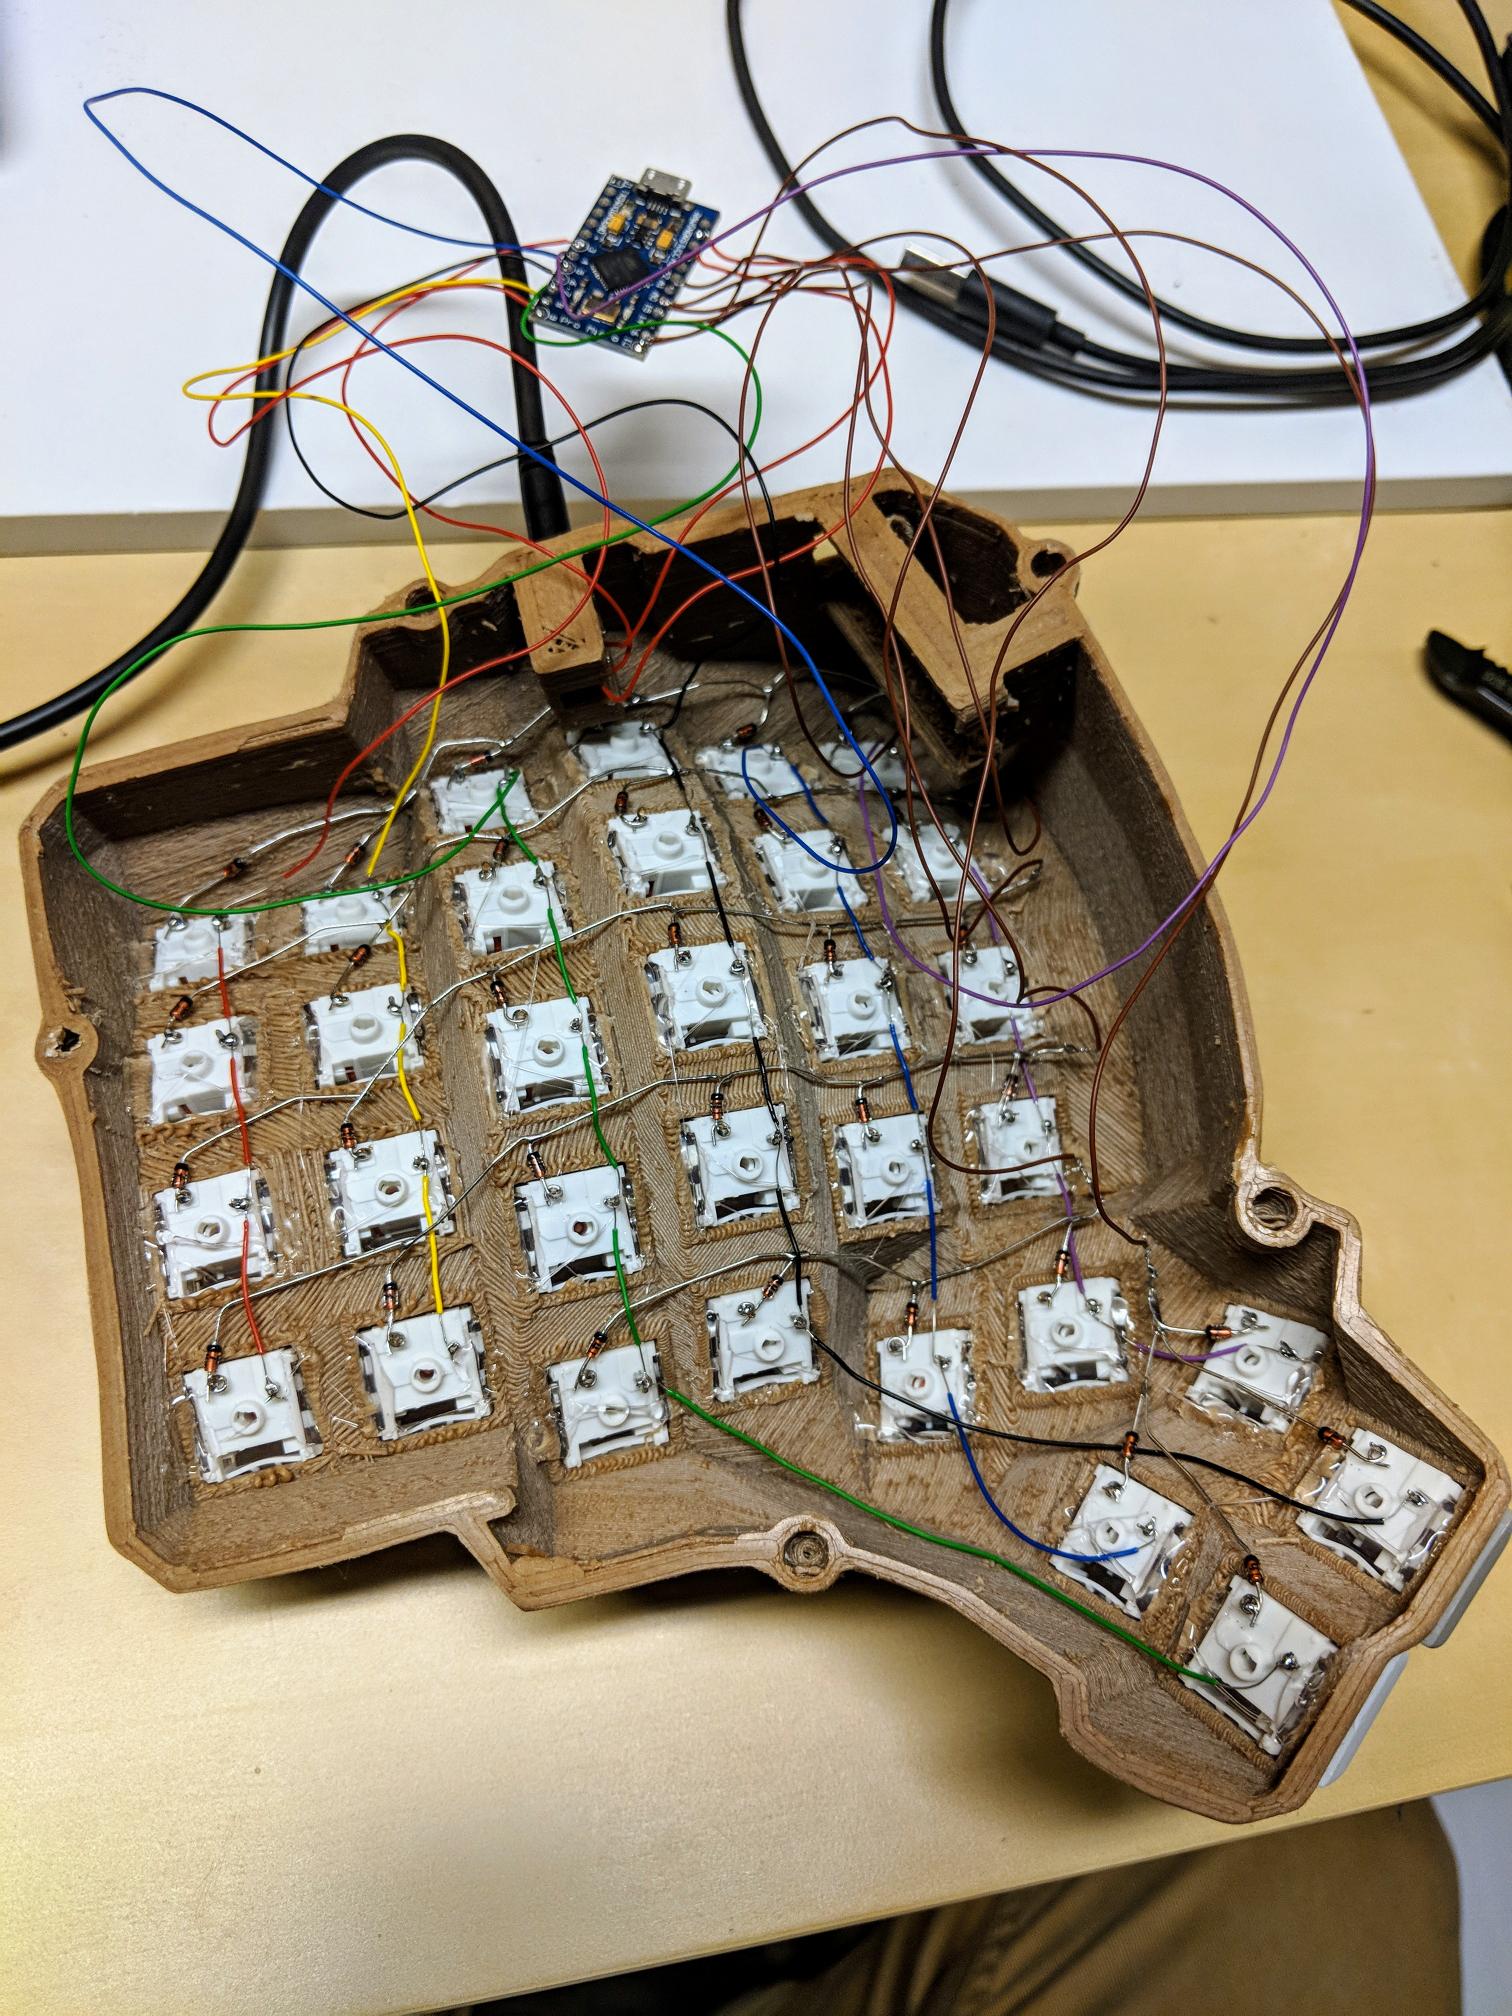
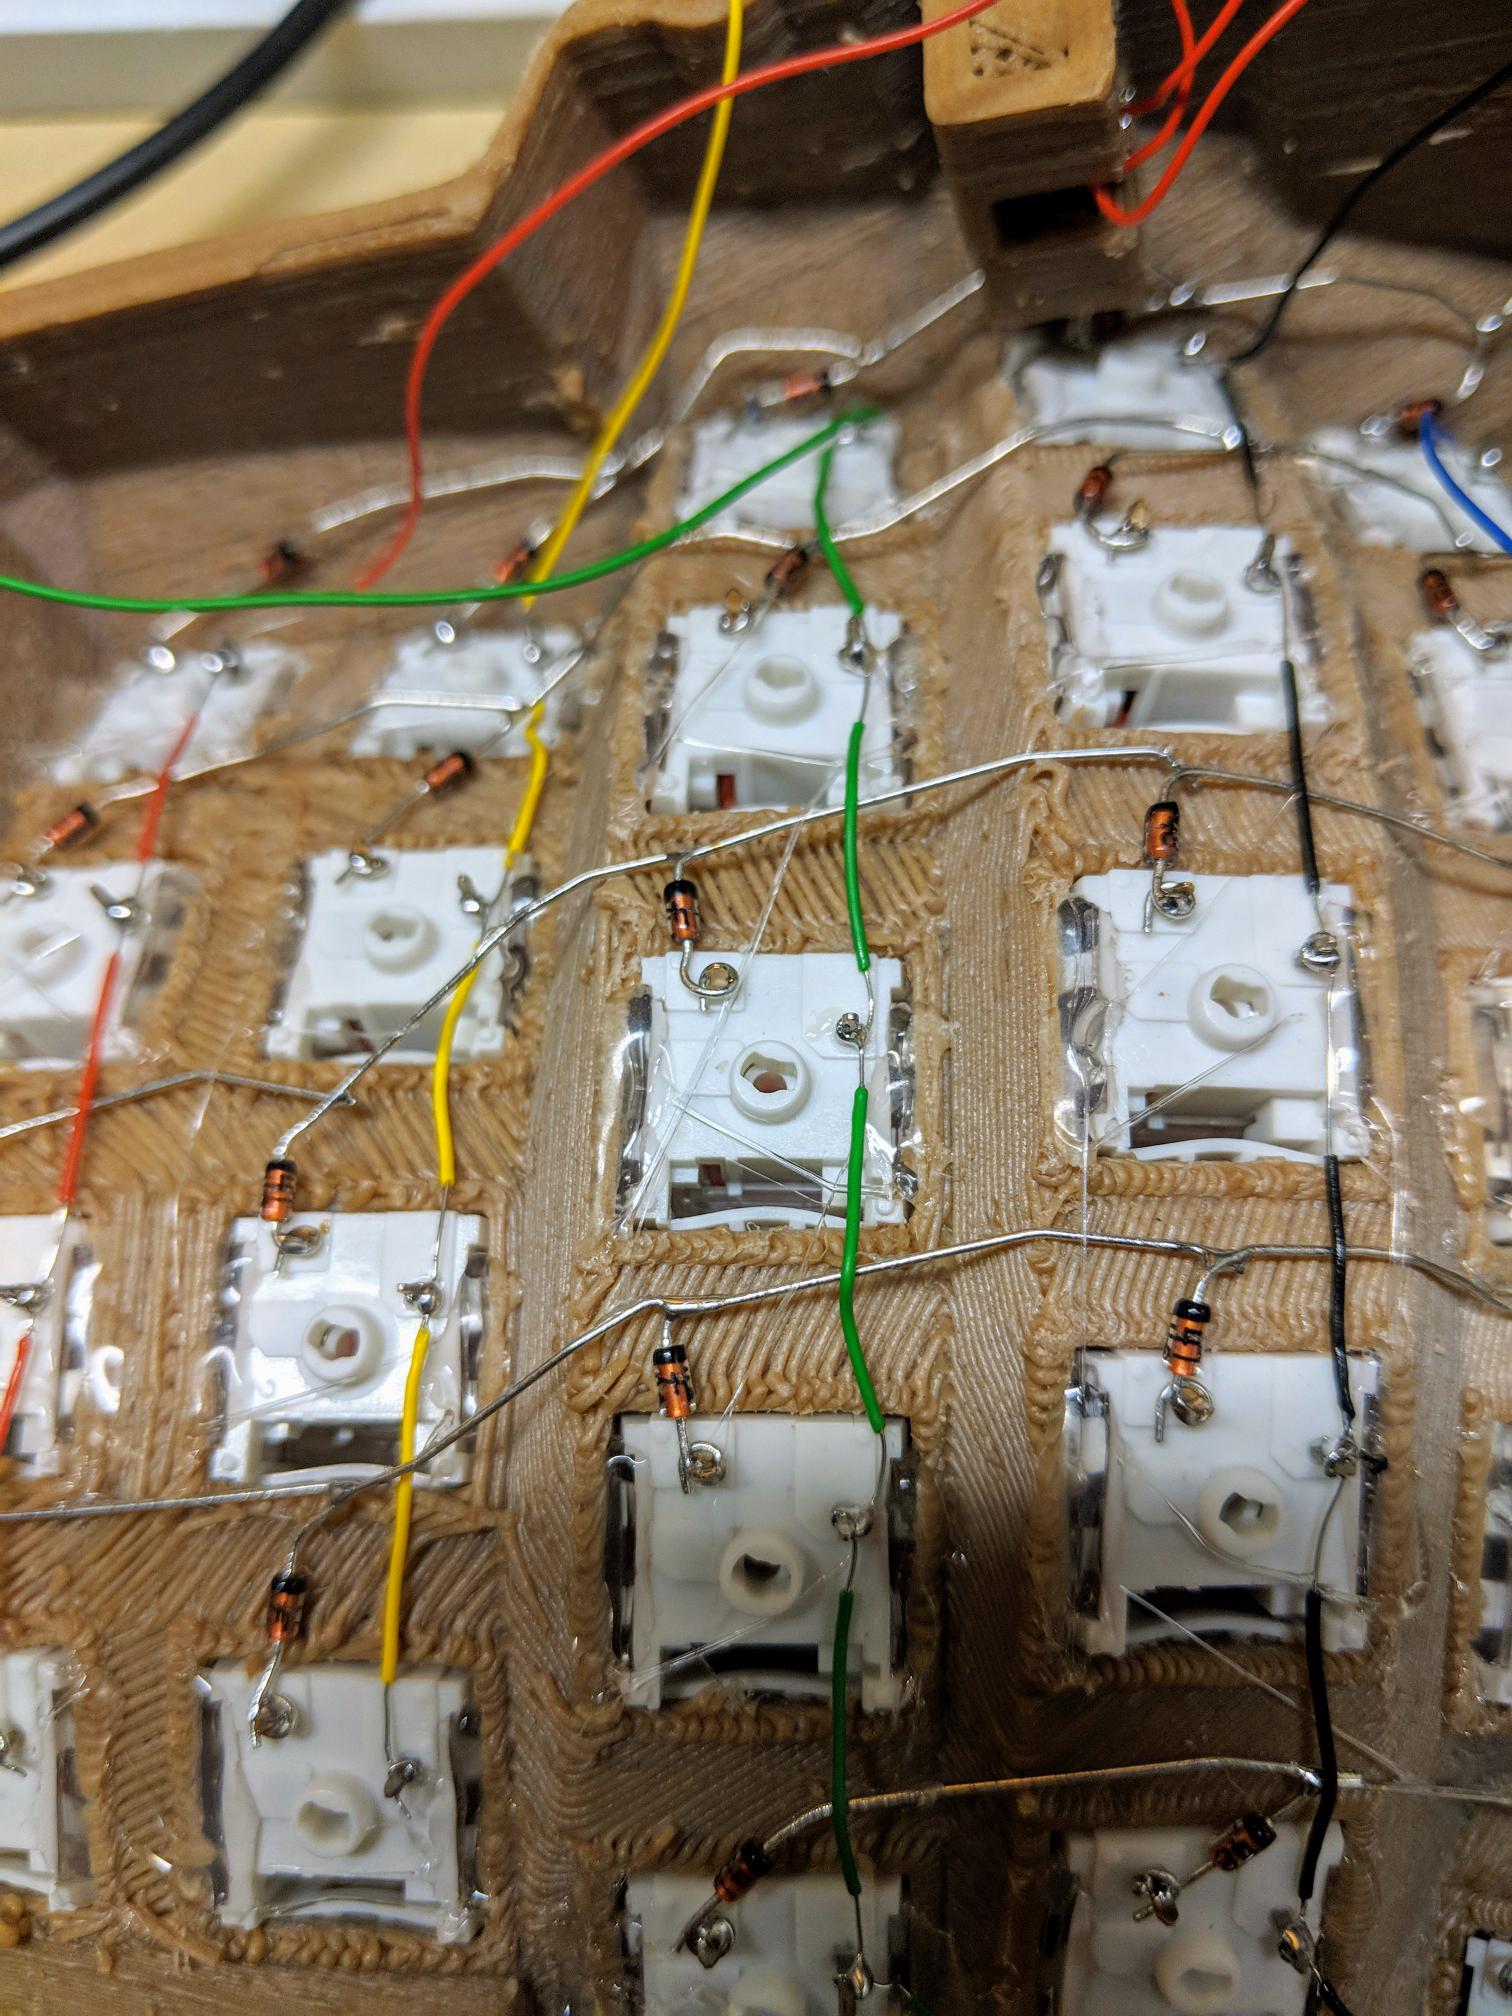
Diodes going into place.
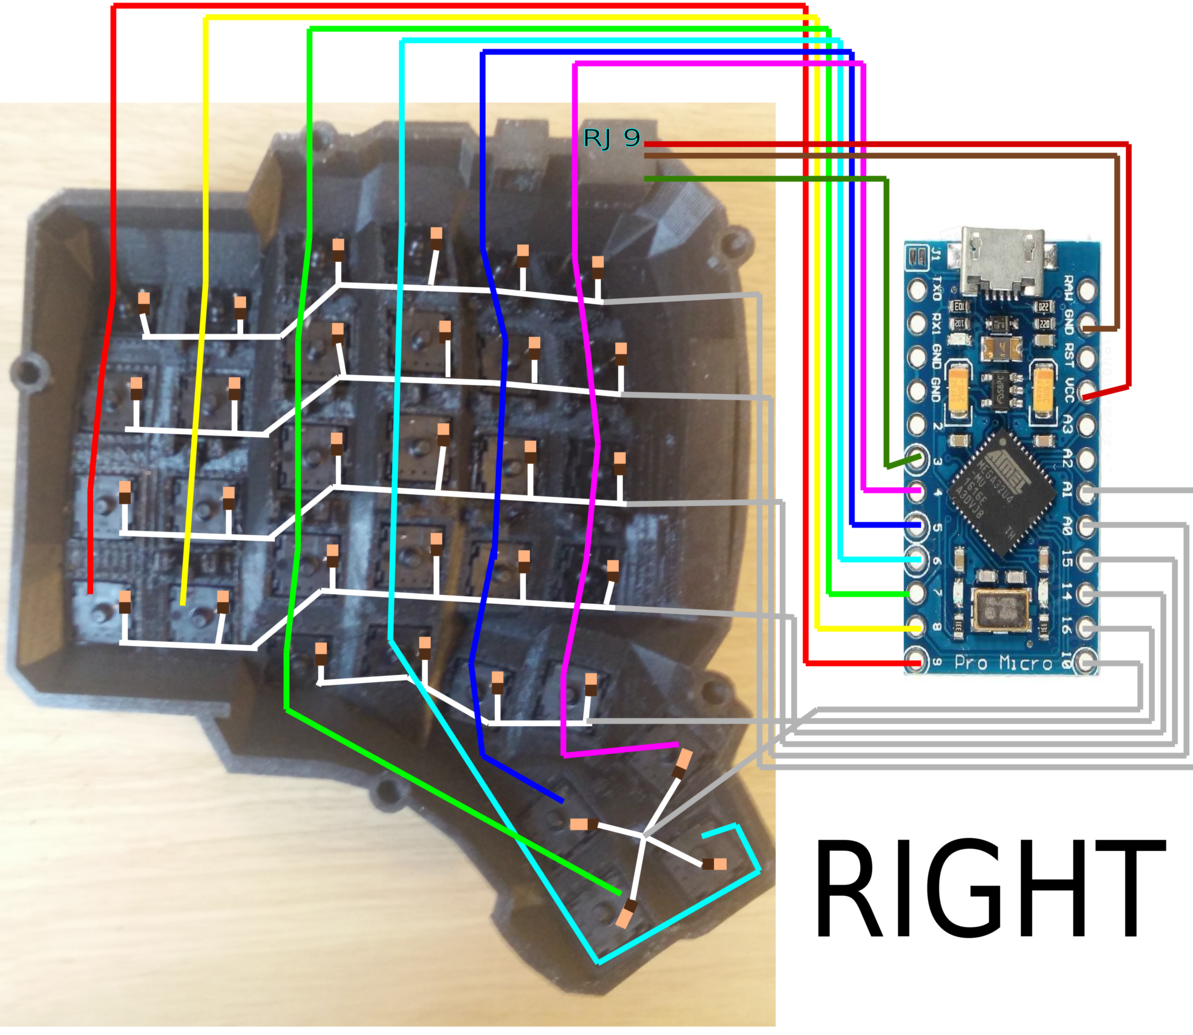
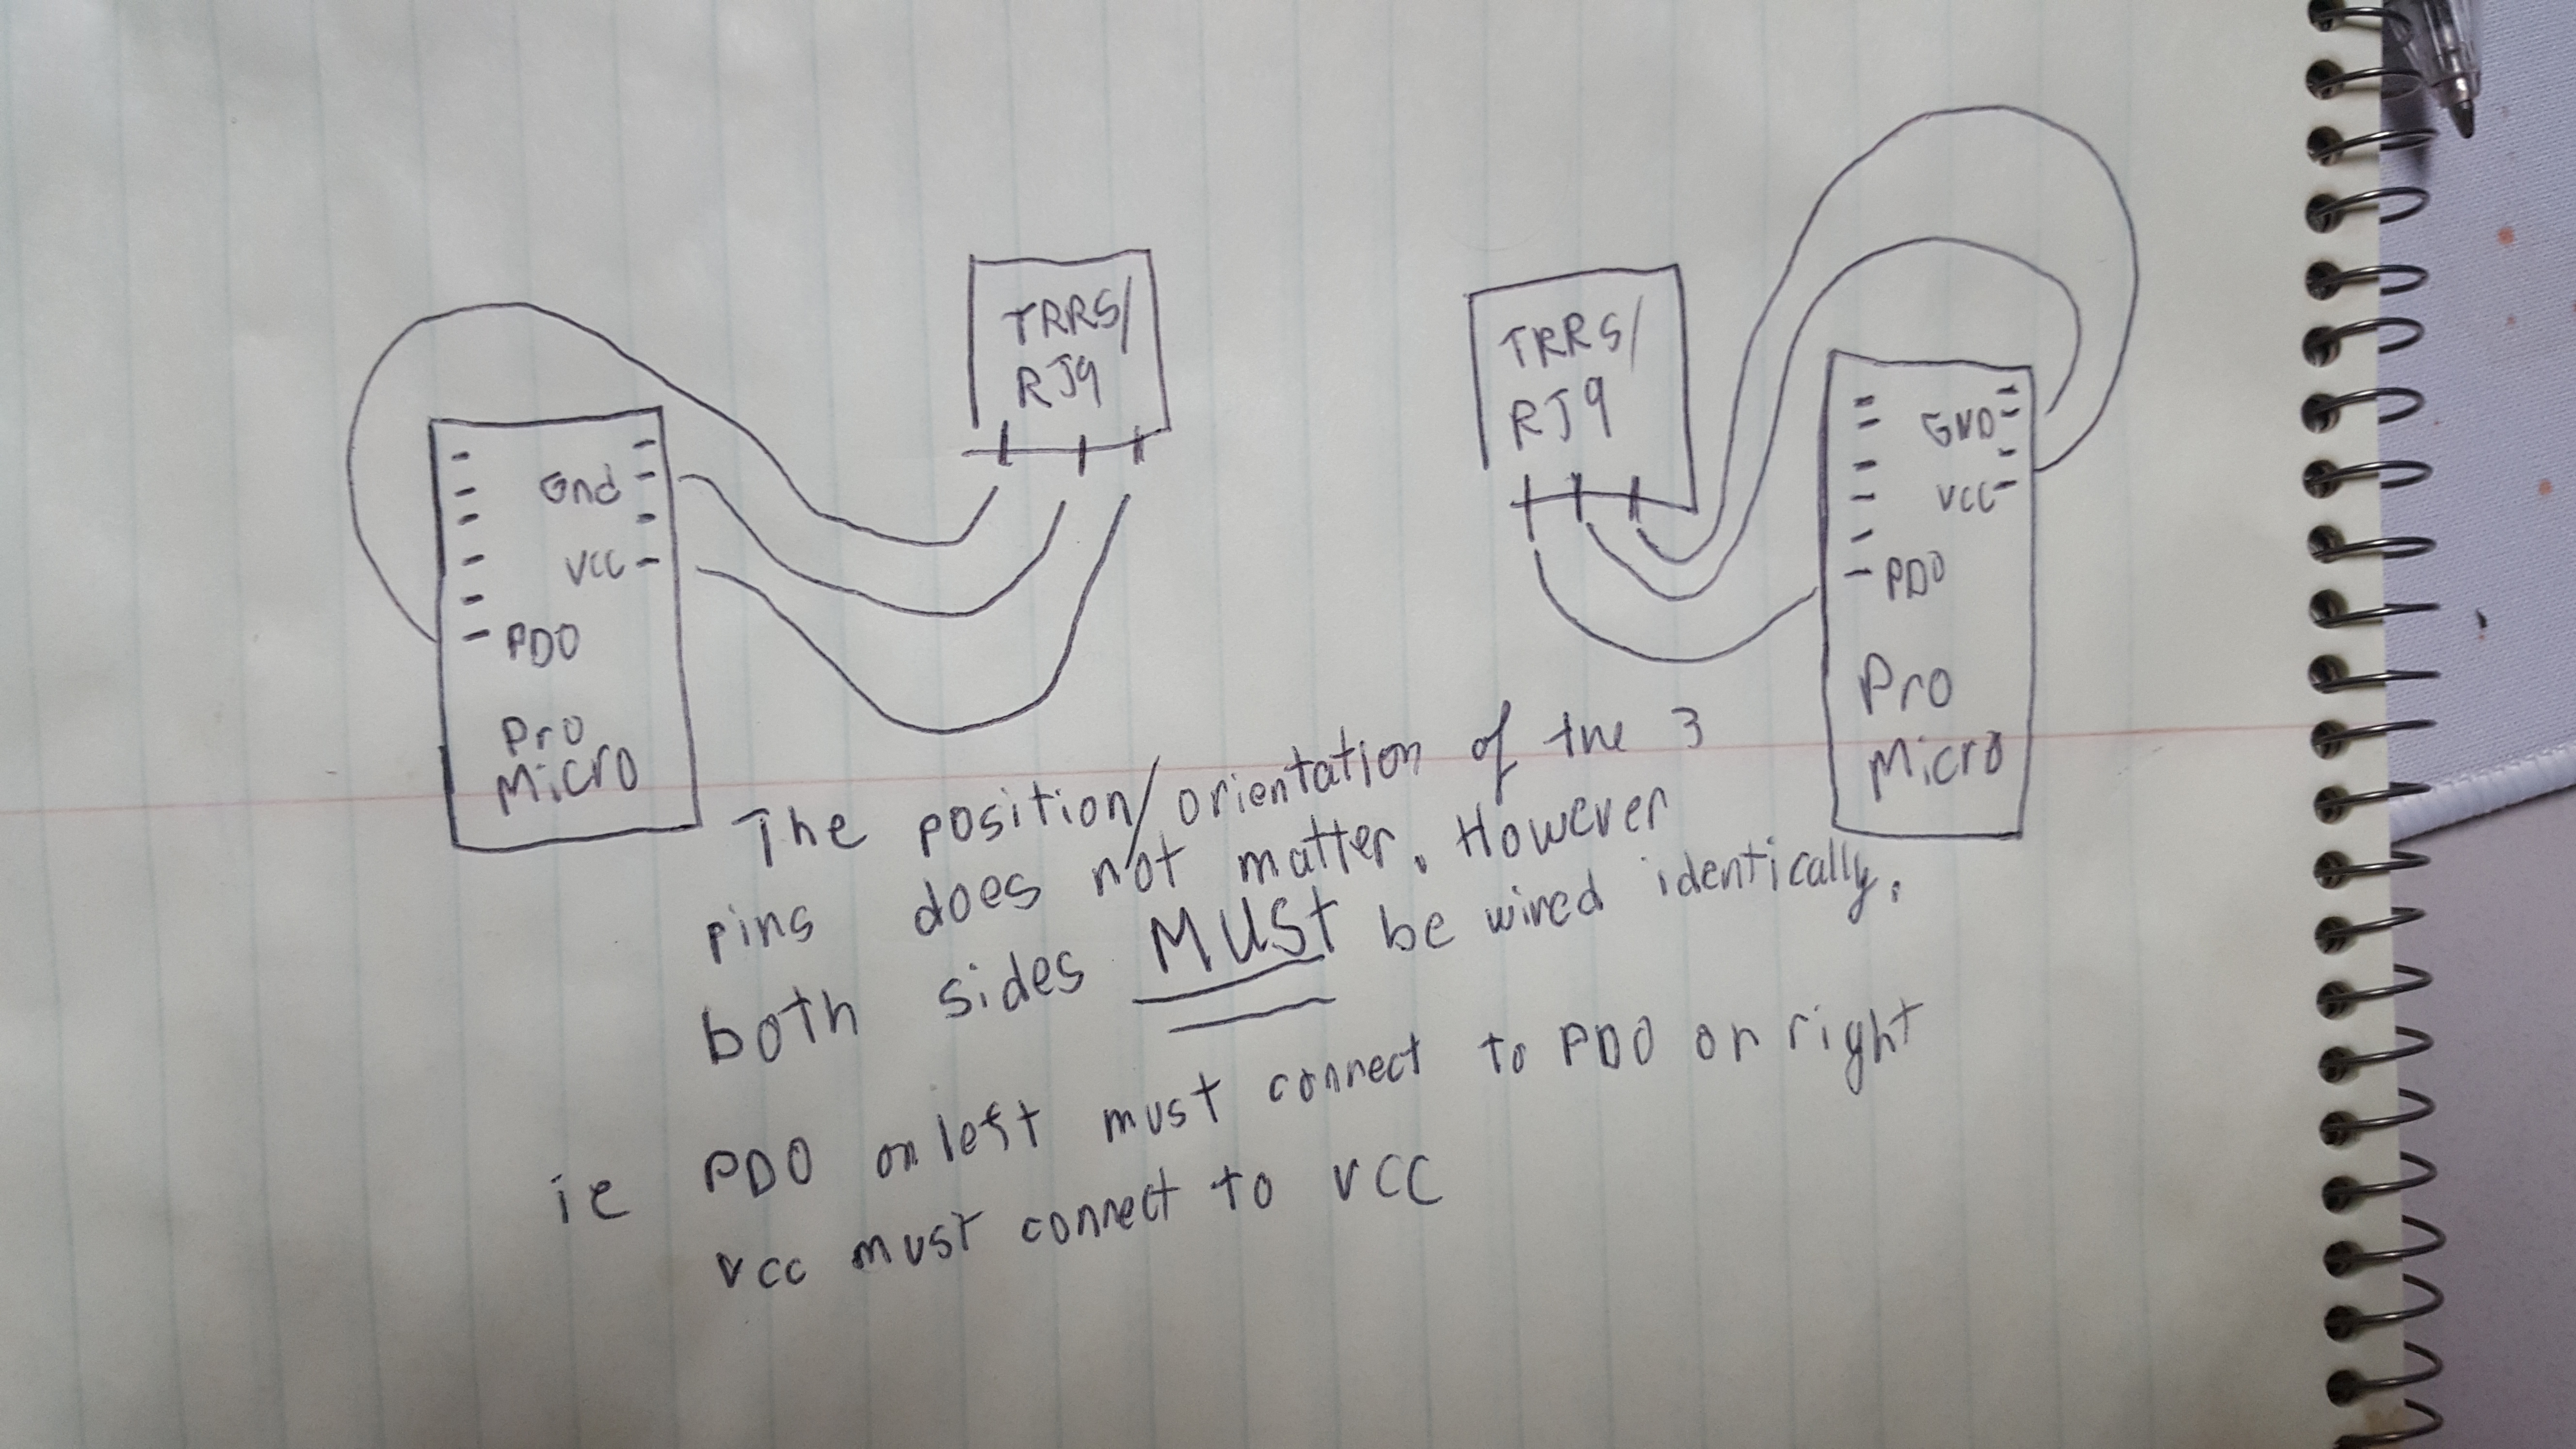
Regarding the RJ9/TRRS connectors: TRRS connectors have 4 pins, but the diagram only shows 3 wires, which means there will be an extra unused pin. Just pick 3 and use them. If you got normal TRS connectors instead, they would only have 3 pins, but the same concept would apply. The position/orientation of which pins you connect to doesn’t matter, as long as they are wired identically. (thanks u/crystalhand) Wiring completed. This is probably 10 hours worth. Yes, I’m slow, but yes, this was my first time handwiring a keyboard and I really didn’t want to frack it up.
Finished Product
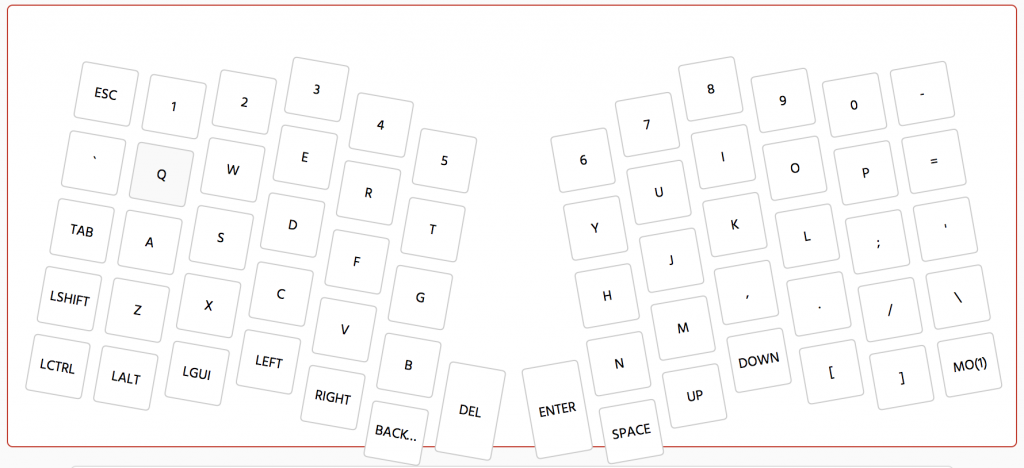
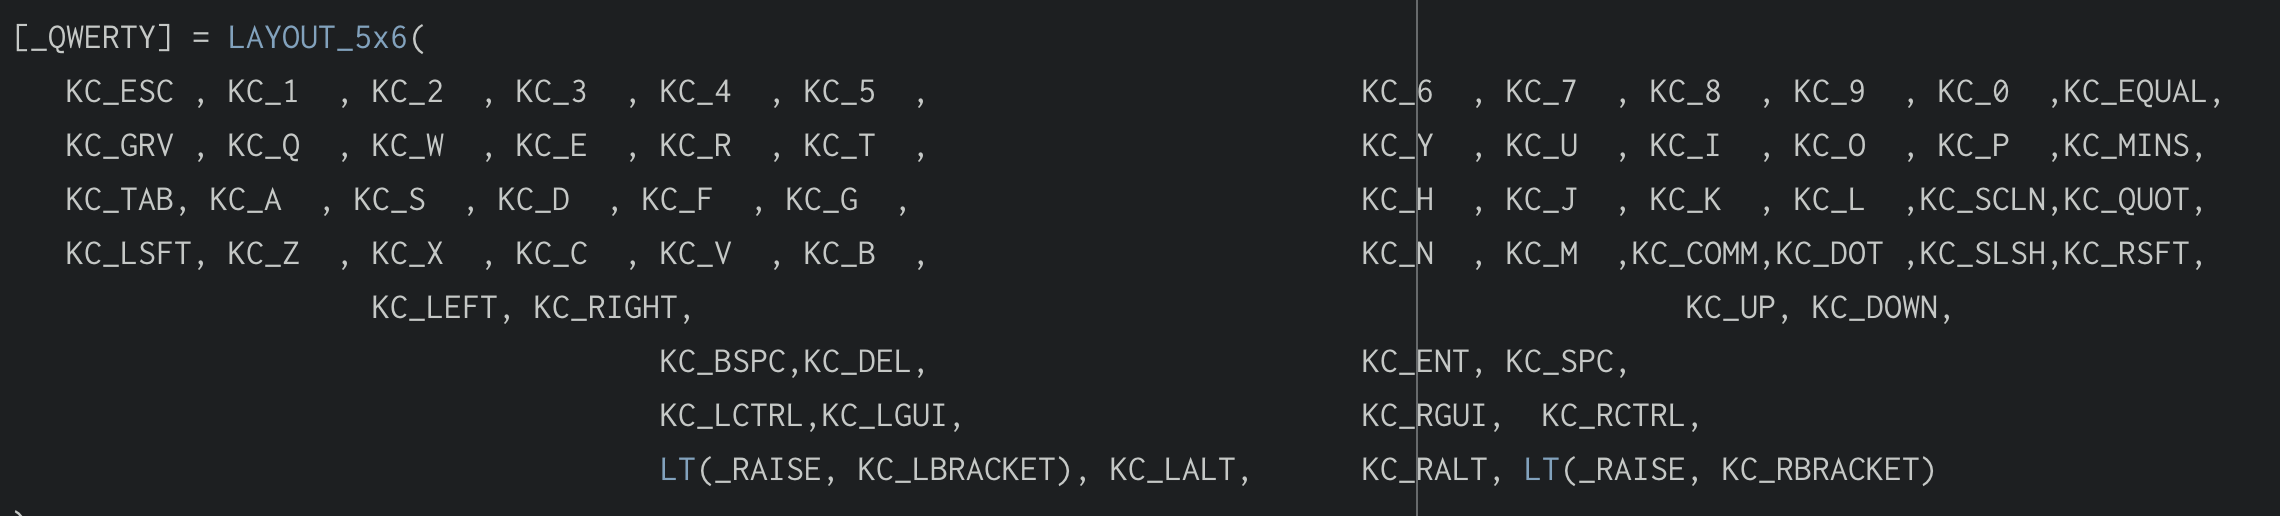
Key Layout
Flashing the Firmware
Start out by downloading QMK toolbox: https://github.com/qmk/qmk_toolbox
Try loading the default hex as shown by the GUI, connect the left half to USB, with both halves connected together. Short the VCC and a GND port to put it in bootloader mode, and immediately hit ‘flash’ in QMK Toolbox. Then, disconnect the left half and flash the right half the same way, with the same file. Then connect the left half again, and you should be getting letters when you type.
Now, to create your own hex. Using the latest release of this repo, I followed these directions: https://github.com/qmk/qmk_firmware/tree/master/keyboards/handwired/dactyl_manuform
(i.e. navigate to QMK firmware folder, and use `make handwired/dactyl_manuform/5×6:default` to generate the hex)
I had to change this bit of code to get it to work properly: https://github.com/technomancy/atreus/issues/34
You may or may not need to do the following to get to this point:
Download Xcode Developer Tools from the MacOS App Store.
Install Xcode Command Line Tools via the terminal.
Install avr with `brew install avr-libc` in terminal, and run various commands to make sure homebrew is updated/upgraded, etc. This may be helpful: https://stackoverflow.com/a/41030599
Checked all the keys with http://keyboardchecker.com/
If you have any keys that don’t register keypresses, try going through and resoldering your connections for those switches. Soaking connections in solder solved my issues with missing keys.
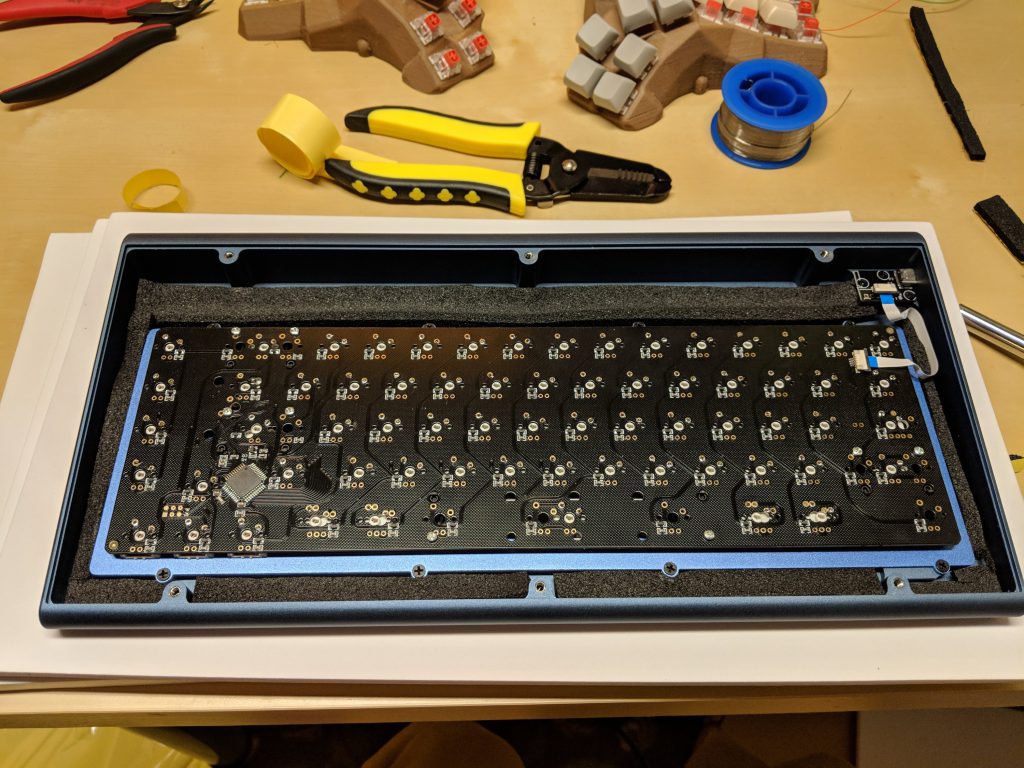
I just finished putting together the CA66 kit. So pretty and retro with SA keycaps.
Caps: SA Dasher
Switches: BOX burnt orange
Things I learned:
CA66 doesn’t work with plate-mount stabilizers, despite having a plate. You have to get PCB-mount cherry stabilizers.
You have to really soak the holes with solder and get it to flow into the hole to get the connection to work properly. I had a few switches that weren’t registering, and I soaked them with solder and they work fine now.
1.75 shifts are sometimes hard to find.
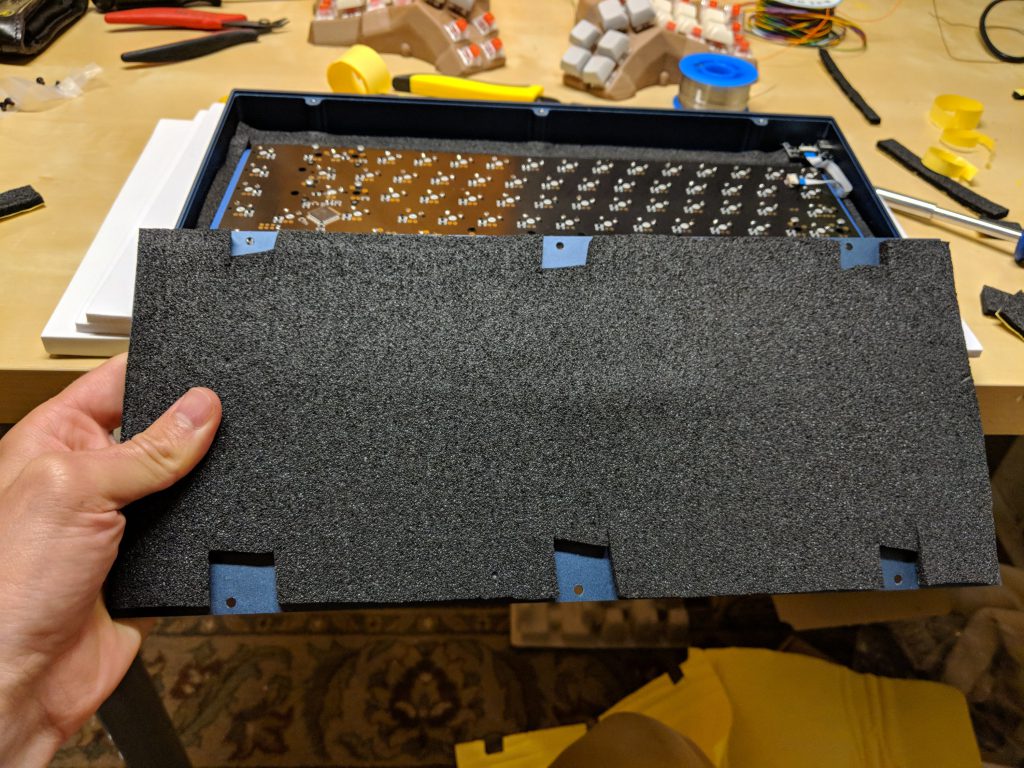
Sound dampening foam for car doors works great for the inside of cases.
The default behavior of WooCommerce is to place orders for physical products in the ‘processing’ status. If you would like to auto-complete all orders with successful payments, including subscription renewals, here’s a free mini-plugin which will do that:
Did you get a pre-built Atreus62 from Profetkeyboards.com with no clue how to edit and re-flash your layout? Here are the steps I took to get it working on a Mac. YMMV:
Determine the path to the keyboard by running some terminal commands. Note: when it says to put your keyboard in bootloader mode, all you have to do is get a paperclip and stick it in the hole in the back of the atreus62. You now have 8 seconds of bootloader mode. (tip: you can also activate Bootmagic)
Flash your hex to the keyboard by putting it in bootloader mode and running the terminal command as shown a little farther down here. For example, in my case, avrdude -p atmega32u4 -c avr109 -U flash:w:atreus62_mylayout.hex -P /dev/cu.usbmodem1411
That’s it! From here on, I can tweak the layout, compile the hex, and flash it.
We recently witnessed some issues occurring when customers using WooCommerce and Subscriptions deleted their payment methods (when they have a credit card “on file”). When they also have active subscriptions using the card they just deleted, most customers don’t realize that they also have to update their card for each of the active subscriptions.
We’ve added a more robust way of dealing with this to the Subscriptions roadmap, but in order to stem the bleeding from the immediate issue, I whipped together a mini-plugin that will pop up an alert whenever a customer deletes a payment method.
Tracking down errors in PHP can be tricky sometimes, but WordPress and WooCommerce have some built in logging to make it easier. Here are a few snippets for future use:
First, you need to turn on wp_debug and logging in your wp-config.php file. This will create a debug.log file in your wp-content folder, which you can then view errors on. This is how I do that:
// Enable WP_DEBUG mode

define('WP_DEBUG', true);

// Enable Debug logging to the /wp-content/debug.log file

define('WP_DEBUG_LOG', true);

// Disable display of errors and warnings

define('WP_DEBUG_DISPLAY', false);

@ini_set('display_errors',0);
Then, you can output specific variables or functions to that debug log.
Some examples:
To view contents of variables, output vars inline in code using error_log( 'In ' . __FUNCTION__ . '(), REPLACE_WITH_VARIABLE_NAME = ' . var_export( $REPLACE_WITH_VARIABLE_NAME , true ) );
To backtrace which functions are using a function error_log( 'In ' . __FUNCTION__ . '(), backtrace = ' . print_r(debug_backtrace(DEBUG_BACKTRACE_IGNORE_ARGS), true));
WC Logs
To access the results of the log easily from the dashboard, you can log to a WC logger rather than the error log. You can access error logs by going to WooCommerce > System Status > Logs.
You can then select the error log file you need and click “View”. This will give you any debugging information that you can copy and share, which is super helpful for the support team. Error logs are also located in the /wc-logs folder within your site install.
Example of running a stack trace on a caught exception: // Log any exceptions to a WC logger
$log = new WC_Logger();
$log_entry = print_r( $e, true );
$log_entry .= 'Exception Trace: ' . print_r( $e->getTraceAsString(), true );
$log->add( 'new-woocommerce-log-name', $log_entry ); Note: this method is updating as of WC 2.7
Starting with WooCommerce 2.7 3.0, logging can be grouped by context and severity. For example: $logger = wc_get_logger();
$logger->debug( 'debug message', array( 'source' => 'my-extension' ) );
I will try to add to and refine this list as I get more logging tools in my toolbelt.
After 3 years working for IronGate Creative, I’ve accepted a position at a new company that will allow me to work remotely full time. I’m super stoked to be on board with Prospress, one of the larger players in the WooCommerce plugin space and general believers in open source software and improving the world.
My new title is still undetermined, but I’m guessing it’ll be somewhere between “Code Detective,” “Support Sleuth,” and “Bug Squasher.” The position is based on the idea of a “Support Engineer,” but I don’t feel like that’s really following the trend of modern tech companies giving their employees catchy titles like “Happiness Engineer,” “Growth Hacker,” or simply “Ninja.”
I’ve passed my Lead Developer torch on to someone who is more than capable of filling my shoes, and it is with some nostalgia that I hand over the reigns of some of my beloved projects. I won’t miss commuting, though.
As I embark on this new position, I’m excited to see how working with a new team will increase my learning curve, as well as how working remotely will decrease my stress. When I told my wife I’d be working remotely full time, she said, “Is this going to affect your hygiene?”
My buddy Zack asked me to make another poster for his reggae night. In doing so, I found a couple of other old ones and I thought post them up here. Full disclosure, I pull heavily from stock vectors, but I still thought these had a cool vibe to them, and they’ve helped me work on my Adobe Illustrator skills immensely.
These two WordPress functions can be somewhat confusing, and and for good reason: they are nearly identical, and used in similar locations. Both are used to display the publish date (and time) of the post. How are they different?
the_date() will only display the same date once per page. This is designed to be used primarily in post lists where you want to group posts by publish date, and it would be redundant to show the same date twice.
For example,
<?php
if ( $the_query->have_posts() ) : while ( $the_query->have_posts() ) : $the_query->the_post();

the_date('Y-m-d', '<h5>', '</h5>');
the_title();

endwhile;
endif;
?>
the_time() is more commonly used to get nearly the same results. It will display the date (and time) every time it used, whether on an archive or post template. Similar to the_date(), it must be used within The Loop.
If you’re in doubt, use the_time()
Example usage:
<div><?php the_time('Y-m-d'); ?></div>
Formatting
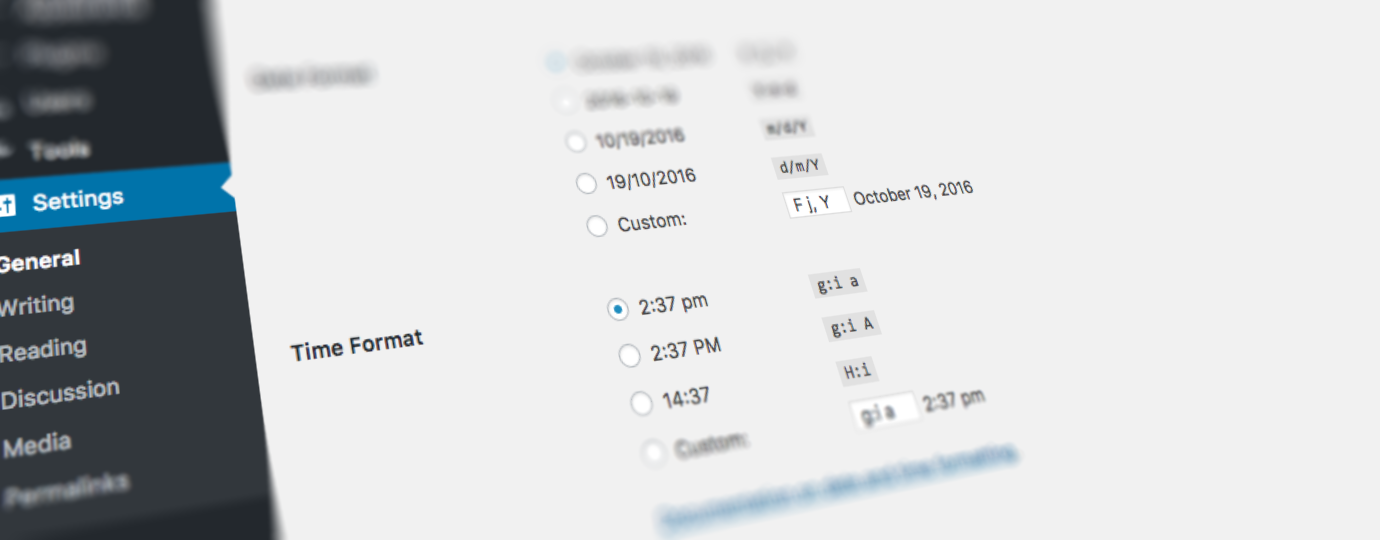
Both functions use standard PHP date/time formatting. However, in a WordPress context, it’s a good idea to use the format that has been set in the admin interface (that’s the point of a CMS, right??). For example:
There is a lot of temptation to create overly complicated websites. Whether influenced by the client that always wants the page to “pop,” or simply pulled along by the hype train of the latest JavaScript frameworks, it is often too easy to make things unnecessarily complicated. Web developers also tend to be a clever bunch, and it’s tough to resist the temptation to flex one’s cleverness.
Here are a couple of fittingly short, uncomplicated opinion pieces on why it’s best to be boring and simple:
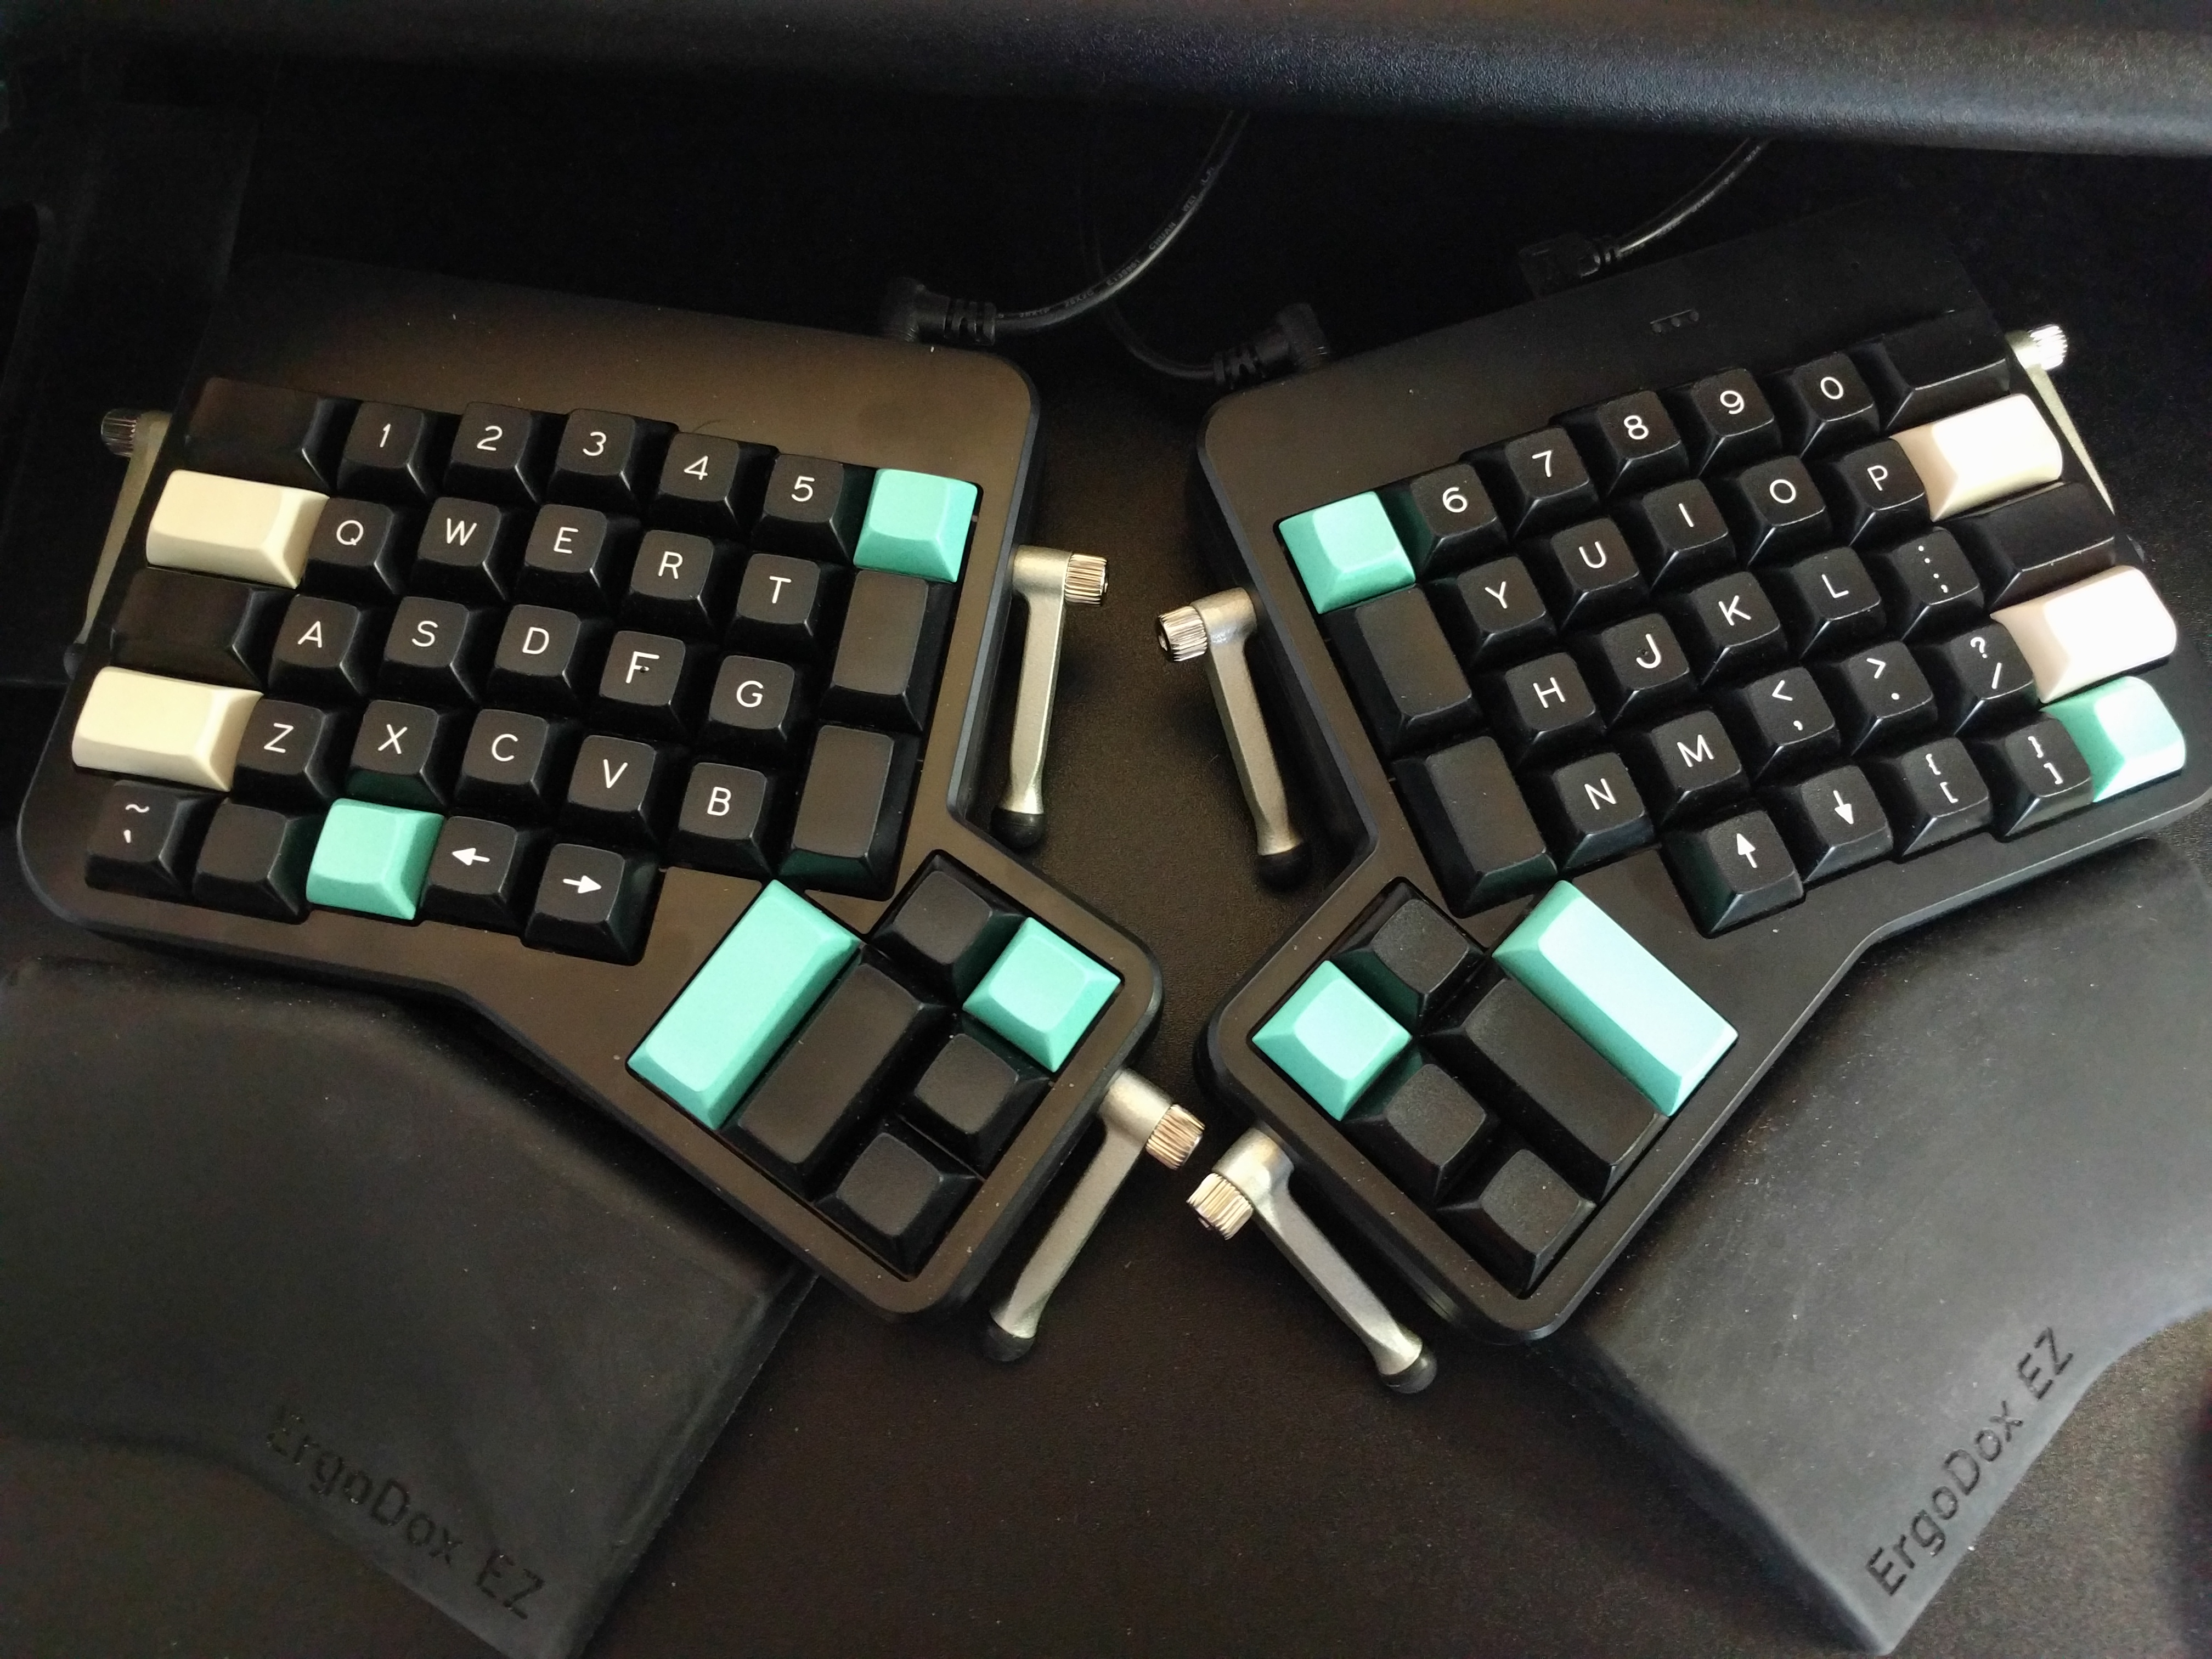
When you work on front of a computer all day, your keyboard becomes very personal. I love stumbling across unique keyboards, and this one certainly fits the bill. Here’s an Ergodox EZ with Datamancer keycaps. It’s like the clash of two worlds for me: the keyboard I type on daily and my grandmother’s preferred way to write paper mail. Very cool.
Like many people, I have issues with varying screen brightness when working long hours or in low-light situations. The issue is particularly apparent when switching from a full-screen text editor with a black background to an achingly bright Google search window.
My solutions thus far have been running f.lux, which changes the color warmth of your screens based on time of day, and wearing out the brightness toggle keys on my keyboard.
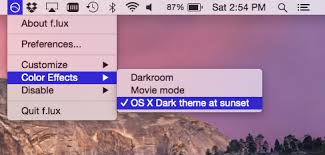
f.lux
f.lux is an application that has been around since 2009, and has a large support base. It works by changing the screen color (warmth). You can set it to change automatically with the time of day or, like I do, just set a standard warmth to help prevent squinting and eye strain during periods of prolonged exposure to white backgrounds.
One huge pitfall of f.lux is that you should be very wary of using this program if you are working with any graphics or design-related projects, as it will completely throw off your colors. I made the mistake of creating a poster design, handbill design and web graphics for a music festival only to realize when we received the printed product that there was almost no yellow or orange in the design, all of which I blame on my use of f.lux.
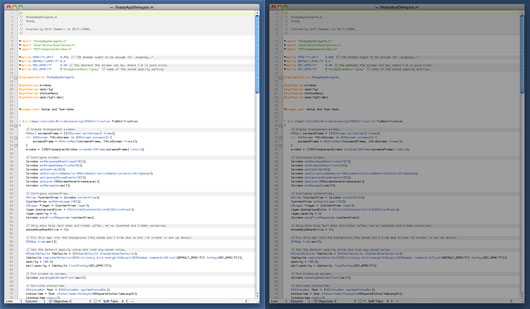
Shady
If you are looking to reduce your screen’s brightness well below the default minimum, or at smaller increments, then try Shady. It works by adding a transparent overlay over your display and changing the transparency of it. It’s a pretty simple application of apparently legit origin, and likely low processing overhead.
Lumen
I just stumbled across an interesting new approach that makes me wish I had thought of it: a program that sets the screen brightness based on your screen contents.
Called Lumen, it appears to solve one of the main issues I have with my otherwise perfect screens. Check it out!
Note: as of this posting, Lumen doesn’t appear to work with multiple monitors, and running alongside f.lux is untested.
I got nauseated for the first time in VR today, and I’m still not sure if it was from losing my VR legs for a minute, or if it was because chat rooms in VR can get super weird. And there was a baby.
When Facebook bought Oculus in 2014 and declared social VR to be the future, there were many that were dismayed by the idea, as if the dark overlord had just revealed his plans to control, and therefore ruin, their VR dreams. Mark Zuckerberg has reiterated on numerous occasions that “VR is going to be the most social platform,” and though I agree with him, it is unfathomable to me that people think that he came up with this idea, or will be in any way able to dominate the space.
Snowcrash (1992)
The dream of social VR really goes back to Snow Crash (Stephenson, 1992), where the “Metaverse,” a virtual alternate reality that is reached by using one’s computer to interact with others using your avatar, is laid out in great world-building detail. I know that Gibson started pulling at a similar thread in Neuromancer (1984), but I don’t think he fully realized the extent to which social interaction would act as VR’s raison d’être. Like many others, I consumed the book within a few years of its release not quite grokking that VR would someday soon be realized.
The dream resurfaced in 2003 when Second Life launched, a massively multiplayer online, and ultimately clunky and disappointing, video game aimed at providing a user-created, persistent virtual world. I was fascinated by the idea behind it, and spent far too many hours suspending disbelief in the primitive graphics and low frame rates.
Though the technical challenges of relatively low internet speeds and the game’s way of delivering graphics (the server would generate the image and send the image to the user) proved to be too much for the success of the game, it was at least a successful step in the direction of the dream of the social virtual world. Yes, there was a lot of weird stuff in Second Life too, from sex dungeons to griefers, but it still felt enough like a video game – 2d screen, clunky controls – that it never really impacted me in a negative way.
Fast forward to today, when technology is finally starting to catch up with the VR dreams of 25 years ago, there are multiple social VR platforms, and I entered one with no reservations. After a couple of false starts getting things set up, I finally found myself in a room with about 15 other floating avatars hanging around a huge screen showing YouTube videos. There was an interface where anyone can search for and add videos to the list, vote on which one they want to see next, and vote to skip the one currently playing.
I was immediately hit with a wave of anxiety, which is weird, since I’ve been comfortable with every other VR game I own and have played for a couple of months, and spent countless hours in my 20’s playing social games on 2d screens. This time it felt more real, more immediate. More weird. A video of someone in a wheel chair sloppily eating a chili dog was quickly followed by real footage of Hitler giving a speech, and one of the avatars immediately stood in front of the screen and started shooting ‘applause’ emoji out of his head. After retreating to the back of the room and asking a few questions about how the video interface worked, and about halfway through the subsequent borderline softcore porn Nicki Minaj video, the baby appeared.
Well, child, I guess. Their avatar was about half as tall as the other avatars, which makes sense in retrospect, since the headsets are tracked in space, and the kid was actually closer to the ground in real life; it was actually a toddler on the other end, donning a VR headseat and fully engrossed. The short avatar was waving their Vive controllers at other people, saying “hi!” and mumbling lots of nonsense, as toddlers tend to do. I was both hit with a jolt of cuteness because, well, toddler mumbling is cute, and a wave of dread, since there are so many potential ramifications of a tiny child wandering around unsupervised in a VR social space. When a death metal video came on the screen and someone said suggestively next to the child, “this song makes me want to kill my parents,” a couple of us went in search of a mod to try and kick the pint-sized orphan out for their own good.
Social VR has a lot of potential – the immediacy of VR can convey emotion in highly concentrated doses – but much like Reddit or other social platforms, it will only truly shine when heavily moderated, and therefore is perceived as safe. A VR version of 4chan’s /b would be truly terrifying. Call me old and stodgy, but if you’ve never felt the impact of social VR then you don’t yet know how much it starts to feel like real life, and we have established social and legal rules in real life.
I’m not saying that we should try to rule the VR social space with an iron fist (we know that never works online), but that if we are going to have little kids running around, probably unable to distinguish between real worlds and virtual worlds, then we need to start putting some serious though into how all this is going to work. Because the dream is finally here, and everyone should pay attention.
As I ripped off my headset last night and tried to recover from my persistent feeling of sweaty nausea, I questioned whether what I had experienced was good or not. I think, just like life, social VR is both good and bad, and extremely weird, and that alone is enough evidence to show that virtual worlds are finally here.
After nearly a couple of decades playing drums and hammering away at keyboards with horrible posture and typing skills, my repetitive stress pain in my hands and arms have led me to this decision to type on an ergonomic keyboard. As strange as it looks, the ErgoDox is pretty comfortable once you get used to it. Sure, it may take a few weeks of frustration before your brain releases the old ways, but it seems worth it so far.
The ErgoDox EZ comes pre-built. Those are custom colored keycaps I put on to help my brain with the unlabeled keys.
One of the great things about this keyboard is that the keys are fully customizable. My preferred layout isn’t much different than the current default, but I’ve changed a few keys around to match my commonly-used functions. For example, I tweak my music volume and screen brightness regularly, and wanted those to be easily accessible (on MacOS, Pause and Scroll Lock adjust screen brightness, and modified with ‘ctrl’, adjusts the secondary screen brightness, if you have one). Here’s my layout:
Click the ‘auto’ button and drag the hex file into the Teensy loader (here’s mine if you want to use it)
On your ErgoDox, hit the Teensy button. This is either assigned to a key on your keyboard, or you can stick a paperclip into the tiny hole on the top right of the keyboard and hit the hardware Teensy button
That’s it!
Note: When you first plug an unusual keyboard into MacOS, you must go through the keyboard setup process that pops up. That process is quick and painless, but if you back out of that, even if by accident, you will have a hard time getting that setup window to retrigger.
Every once in a while, among the piles of meme-filled dreck, something really poignant gets posted to reddit. This particular one is a bit dark, but it’s a great example of the story behind the artwork being the driver of emotion. Credit to marksonwalls for his great, and somewhat disturbing, art.
Sparrow, oil on board, 18×24 in. – marksonwalls 2016 – click for larger
An old acquaintance called up asking for help: he was rebranding his family business with an emphasis on heavy machinery and he wanted help with a website and logo. I said sure, as long as he wouldn’t mind using a pre-made theme.
It had been so long since I had tried to quickly throw together a website that I had forgotten how amazing it is to be able to purchase a decent commercial theme and deploy a site so quickly. We pulled a heavy-machinery-looking font and color scheme and had a site up on super short notice. Fun, so fun.
Acted as lead developer on complete redesign and overhaul of hospital website as they transitioned to an umbrella health organization.
We used WordPress as a CMS to provide a user-friendly experience for the non-tech-savvy content administrators. Heavy use of custom fields allowed us to provide places for lots of custom editable content while preventing design creep.
The entire project took nearly a year to complete, and involved cutting a many-thousand-page website down by a factor of ten to allow for future growth in a much more organized fashion.


















 I just finished putting together the CA66 kit. So pretty and retro with SA keycaps.